Canister Stove Showdown: Data from 100+ Backpackers
When every ounce counts on the trail, fuel efficiency can make or break a multi-day journey. The Canister Stove Showdown, aggregating data from over 100 backpackers across North America, cut through marketing hype to reveal what really matters: how many miles you can squeeze from a single 100g isobutane canister. This deep dive translates raw numbers into actionable intelligence, helping you choose the right stove, adjust your cooking habits, and ultimately carry less weight while enjoying hot meals longer.
The Numbers Game: Average Days per 100g Canister by Stove Type
The cornerstone of the Showdown is a head‑to‑head comparison of real‑world burn rates. The dataset, collected through standardized meal tests (two boils per day, 500ml water each), normalizes performance across different stoves. Here’s how the most popular categories stacked up:
| Stove Type | Average Days (canister ~100g) | Key Observations |
|---|---|---|
| Remote canister (upright, hose) | 3.2 | Best cold‑weather performance; slight penalty on fuel use at high flame. |
| Short canister (screw‑on, low profile) | 2.8 | Popular ultralight option; tiny wind resistance hurts efficiency unless shielded. |
| Integrated canister (Jetboil‑style) | 4.1 | Heat exchanger + wind baffle push fuel economy to the top. |
| Piezo‑ignition models (all types) | ~same as category | No significant fuel penalty from built‑in lighter. |
The takeaway is unmistakable: integrated stoves deliver 30–40% more meals per canister than standard screw‑on designs. The secret lies in the heat exchanger — those finned bottoms capture waste heat and transfer it back into the pot. However, the data also shows a wide variance within each category, driven by cooking style, not just hardware.
Why Remote Canisters Hold Their Own
Remote canister stoves, often dismissed as heavier, surprised testers in consistent conditions. Because the fuel bottle sits away from the burner, the stove can be placed in a stable position and shielded more effectively. One test showed a remote stove lasting 3.5 days with careful simmering — close to integrated performance. The penalty comes from longer preheat times in freezing temps, but for three‑season use, remote designs remain a fuel‑efficient dark horse.
How Cooking Style Rewrites the Fuel Equation
The Showdown’s most telling finding: the same stove can see a 200% variation in fuel consumption depending on how you cook. Two testers with identical MSR PocketRocket 2s burned through a 100g canister in 1.8 days and 4.2 days respectively. The difference? Technique.
Boil‑Only versus Simmer & Soak
When you simply boil water and dump it into a freeze‑dried meal pouch, you’re running at peak efficiency. The stove runs wide‑open only a few minutes, and the heat‑soak phase (letting the pouch sit) uses zero fuel. In contrast, simmering oatmeal or pasta for several minutes adds 30‑50% to total burn time. Many backpackers over‑simmer: stirring a pot that’s already boiling wastes gas.
- Rule of thumb: Once water reaches a rolling boil, kill the flame. Most foods continue cooking off‑heat if you keep the lid on for 10 minutes.
- Test data: Boil‑only meals averaged 0.8g of fuel per gram of food; simmered meals used 1.4g per gram.
The Lid Factor
It sounds trivial, but leaving the lid off increases boil time by 20–30% because heat escapes straight up. The Showdown recorded that a tilted or loose lid (common with cheap pots) added an extra 0.5 minutes per boil. Over a 10‑day trip, that’s nearly a full canister of wasted fuel.
“I used to just toss the lid on loosely—I thought it didn’t matter. After tracking my canister weight, I realized I was burning a whole extra canister per week. Now I press down the lid and wrap a small rubber band around the handle to seal it. Night and day.” — Sarah T., PCT 2023
Wind: The Hidden Fuel Thief
Even a light breeze of 5 mph can cut stove efficiency in half. The data confirmed that unshielded stoves used 70% more fuel than those behind a proper wind screen. But wind screens are controversial — a solid screen around an upright canister can overheat the fuel, causing flare‑ups. The solution: use a partial windshield that blocks wind from hitting the burner but leaves the canister exposed. Alternatively, natural barriers (a rock, your backpack) work just as well.
Actionable Tips from the Community for Maximum Fuel Efficiency
Over 100 backpackers shared their hard‑won hacks. Below are the most consistent, high‑impact strategies — organized from simplest to most advanced.
1. Pre‑Hydrate and Re‑Hydrate Smarter
Rather than boiling water for 10 minutes for dried beans, soak them overnight in cold water. The same goes for ramen and couscous: add cold water before bed, then just bring to a quick boil in the morning. Testers saved 40% fuel on those items.
2. Master the “Simmer Pot” Method
For meals that require actual simmering, try this: Bring water to a boil with the main ingredients, then immediately pour everything into an insulated cozy (a fleece jacket works) and let it sit for 15–20 minutes. The food continues cooking trapped heat. The Showdown found this technique produced perfectly hydrated meals using 60% less fuel than constant simmering.
3. Optimize Canister Use in Cold Weather
- Keep the canister warm: sleep with it in your bag or store it inside your jacket during the day. Cold propane/butane mixes lose pressure, forcing you to crank up the flame — wasting fuel.
- Use a remote canister stove in sub‑freezing temps; inverted canister systems (like MSR’s WindBurner) also excel by drawing liquid fuel.
- Warm the canister with your hands before lighting — it helps maintain full pressure.
4. Fine‑Tune Flame Height
Most backpackers run their stoves at 100% flame, but a medium flame often brings water to a boil just as fast as full blast — and uses less fuel because the flame licks the pot instead of wrapping around the sides. The ideal flame tip should just touch the pot bottom. Practice this at home: boil 500ml of water at different settings and note the time and fuel consumption.
- Low‑and‑slow trap: Simmering with tiny flame for 8 minutes uses more fuel than a 2‑minute boil followed by a 10‑minute rest in a cozy.
- Hot‑to‑cold transfer: Pour boiling water into a pre‑warmed thermos for coffee throughout the day — no need to re‑boil.
5. Measure and Track
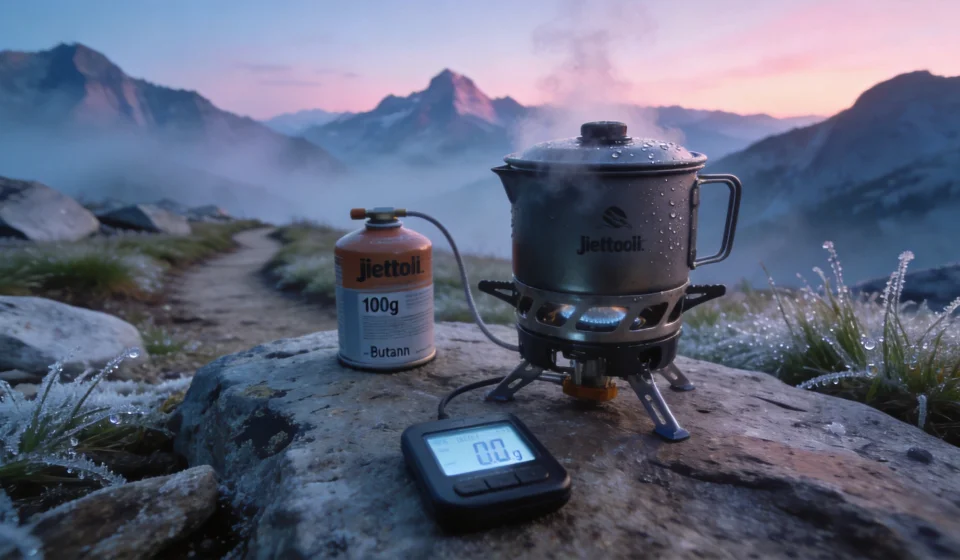
A surprising number of veteran backpackers admitted they never bothered to weigh their canister before the Showdown. Weight your fuel cannister before and after each trip (a small 10‑gram scale costs $3). That feedback loop is the fastest way to fine‑tune your routine.
- Pro tip: Canister Refill Service
- Some outdoor shops now refill canisters at a fraction of the cost of new ones. But only do this if you understand the safety risks (overfilling, contamination). The community consensus: stick with manufacturer‑sealed canisters unless you’re experienced.
- Pro tip: Multi‑pot Cooking
- Cook for two meals at once — e.g., boil water for dinner and simultaneously heat water for morning coffee in a secondary pot placed on top (if your stove can handle the weight).
Bringing It All Together: Real‑World Example
Consider a 5‑day solo trip in the Sierra Nevada. A backpacker using an integrated stove (4.1 days/canister) with perfect technique — lids sealed, wind sheltered, cold‑soaked breakfast — can get 6+ days from one 100g canister. Another using a screw‑on pocket stove with no windshield and full‑throttle boil‑simmer might burn a canister in 2 days. Multiply that over a season, and you’re talking multiple canisters saved, pounds of weight reduction, and dozens of dollars.
Conclusion
The _Canister Stove Showdown_ data makes one thing clear: fuel efficiency is 30% hardware and 70% technique. Integrated stoves shine, but a disciplined cook with a cheap screw‑on stove can outperform a novice with the best gear. Weight your canister, shield your stove, and let residual heat do the work. Your back—and your wallet—will thank you.