Ultralight Winter Cook Kit: What to Pack for Snow Camping
Introduction
Snow camping transforms a simple overnight into a sub‑alpine expedition. Cooking in sub‑freezing temperatures demands gear that is both ultralight and brutally reliable. A single stove failure or a pot that won’t simmer can ruin a trip and, worse, put you at risk. This guide breaks down every essential component of an ultralight winter cook kit — from pots and stoves to fuel choices and overlooked accessories — so you can melt snow, boil water, and enjoy hot meals without carrying unnecessary weight.
Choosing the Right Cookware for Snow
The pot is the centerpiece of your cook system. In winter, it must do double duty: boil water efficiently and, just as critically, melt large volumes of snow. Snow melting takes far more surface area and heat than simply heating water, so a narrow, tall pot will waste time and fuel. Look for a pot with a wide base — at least 4.5 inches (11.5 cm) in diameter — and a capacity between 0.8 L and 1.3 L for solo use. For two people, 1.5 L is the sweet spot.
Material Showdown: Titanium vs. Aluminum vs. Hard‑Anodized
| Material | Weight (per L) | Heat Distribution | Durability | Best For |
|---|---|---|---|---|
| Titanium | ~80 g | Poor (hot spots) | Very high (won’t dent) | Ultralight solo, short trips |
| Aluminum (uncoated) | ~60 g | Good | Low (easily dents) | Budget builds |
| Hard‑anodized aluminum | ~85 g | Excellent (even simmer) | High (scratch‑resistant) | Winter group cooking |
Example scenario: I switched from a 0.9 L titanium pot to a 1.1 L hard‑anodized MSR Alpine pot. The titanium pot scorched oatmeal and took forever to melt snow because the narrow base barely contacted the flame. The wider, anodized pot now melts a full pot of snow in under 4 minutes and simmers soup without burning. That extra 15 g is worth every ounce.
Lid, Heat Exchanger, and Pot Gripper Necessities
Don’t forget a tight‑fitting lid — it cuts boil time by 15–20%. A heat exchanger (fins on the pot bottom) can further reduce fuel use by 25% in windy conditions, but adds ~20 g. For winter, I recommend sacrificing the heat exchanger unless you’re facing sustained gales, because it makes the pot harder to pack. Finally, a pot gripper is non‑negotiable: metal handles get burning hot, and gloves make handling awkward. Silicone grippers (e.g., the Sea to Summit X‑Pot Gripper) weigh 10 g and prevent disastrous spills.
The Heart of the System: Stoves That Laugh at Cold
Your stove is the most critical piece. In winter, a stove that fails at 20 °F is a liability. Two camps dominate: canister stoves (compact, instant ignition) and liquid fuel stoves (reliable in deep cold). Let’s cut through the hype.
“I’ve been winter camping for 15 years, and I’ve learned the hard way that a canister stove below 15 °F is a false economy. The pressure drops, the flame sputters, and you’re left eating cold chili. A liquid fuel stove requires a minute of priming, but it roars to life at –20 °F every single time.” — Mike R., Alaska guide
Canister Stoves: Lightweight but Temperature‑Sensitive
Stoves like the Soto Windmaster or MSR PocketRocket Deluxe are beloved for their weight (~60 g with igniter) and simplicity. However, standard isobutane‑propane canisters lose pressure as temperatures drop. Below freezing, the flame weakens; below 10 °F, it may not light at all. Tricks to extend their range:
- Use a winter‑blend canister (higher propane ratio, e.g., MSR IsoPro) that stays volatile to about 0 °F.
- Sleep with the canister in your bag to warm it overnight.
- Invert the canister (if your stove supports it) to draw liquid fuel, but this requires a specialized stove like the Kovea Spider.
Real‑world case: A friend used a standard PocketRocket with a winter blend at 12 °F while melting snow for two. The flame flickered so badly that each liter took 10 minutes. He finished melting at 11 p.m. and vowed never to rely on canisters again below 20 °F.
Liquid Fuel Stoves: The Cold‑Weather Workhorses
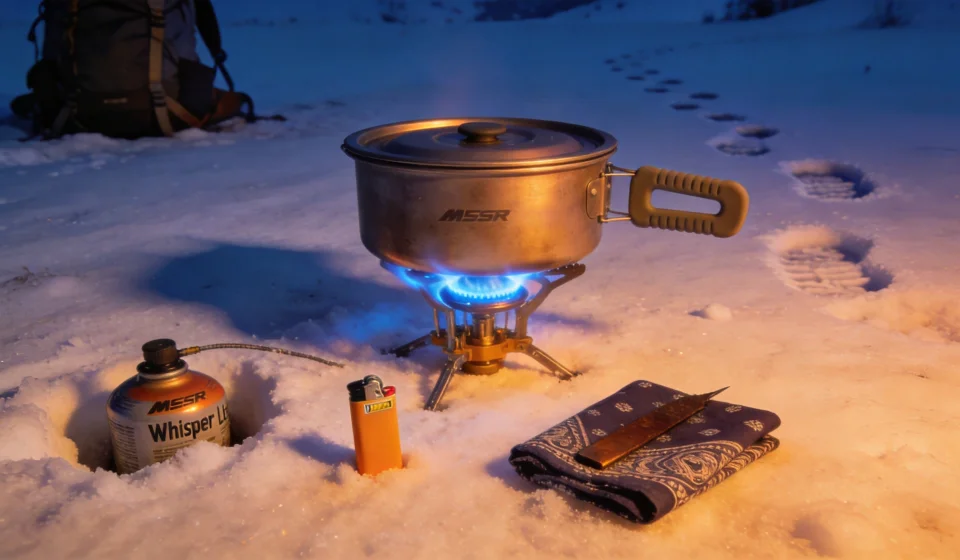
Stoves like the MSR WhisperLite Universal or Primus OmniFuel burn white gas, kerosene, or even unleaded. They weigh more (120–200 g) and require priming (pre‑heating the fuel line), but they produce a consistent flame in any temperature. For snow camping, liquid fuel is the gold standard when temperatures drop below 20 °F or when you’re melting snow for more than one person.
Windscreens: A Critical Safety Balancing Act
Wind kills stove efficiency. A good windscreen can cut boil time in half. But never wrap a windscreen fully around a canister stove — it traps heat and can cause the canister to overheat and explode. Instead, use a partial shield (e.g., the MSR Flex or a DIY foil screen) that blocks wind without enclosing the canister. For liquid fuel stoves, you can use a full wrap (the fuel tank is remote). Always leave a gap at the top for ventilation.
Fuel Decisions: Canister vs. Liquid — The Ultimate Showdown
Your fuel choice determines your stove, your pack weight, and your risk tolerance. Below is a side‑by‑side comparison for winter conditions.
| Factor | Canister (Isobutane‑Propane) | Liquid (White Gas) |
|---|---|---|
| Weight per 100 mL fuel | ~130 g (with steel canister) | ~100 g (in plastic bottle) |
| Cold performance | Struggles below 20 °F | Works down to –30 °F |
| Priming required | No | Yes (1–2 minutes) |
| Packing complexity | Simple (screw onto stove) | Requires fuel bottle, pump, cleaning |
| Risk of failure | Low in mild cold; high in deep cold | Low overall (if maintained) |
Practical advice: If you camp in the lower 48 where winter temperatures rarely drop below 20 °F, a winter‑blend canister with a windproof stove (e.g., Soto Windmaster) is fine for 1–2 nights. For multi‑day trips above 10,000 ft or in the Rockies, bring a liquid fuel stove. And always carry a backup ignition source — a mini Bic lighter and a ferro rod (see accessories below).
Accessories That Make or Break Your Trip
A few grams of well‑chosen accessories can turn a frustrating snow melt into a smooth routine. Here’s what belongs in your kit.
Pot Grips, Lighters, and Repair Kits
- Pot gripper — Silicone or metal? Silicone (e.g., Sea to Summit) is lighter and more glove‑friendly; metal can get hot. I prefer silicone for winter because frozen fingers lose dexterity.
- Lighters — A standard piezo igniter on a stove is unreliable in cold, damp conditions. Carry a mini Bic lighter (protected in a Ziploc) and a small ferro rod (e.g., Exotac nanoSTRIKER) as a backup. You can shave magnesium onto a cotton ball soaked in petroleum jelly — that fire starter weighs 10 g and works wet or cold.
- Repair kit — For canister stoves: a small O‑ring (the rubber seal that connects canister to stove), a 4‑inch piece of duct tape, and a paperclip to clear clogged jets. For liquid fuel: a cleaning wire (included with most pumps) and a spare pump cup. I once watched a friend’s WhisperLite fail because a tiny O‑ring cracked at –5 °F. A $0.50 ring saved the trip.
Packing Order for Ultralight and Convenience
- Inside the pot
- Stove (wrapped in a bandana to quiet rattling), small fuel canister (if using canister), lighter, pot gripper, and repair kit. This forms a tidy, protective bundle.
- In a separate stuff sack
- Liquid fuel bottle (if using white gas) — keep it upright and padded to prevent leaks. Never put the fuel bottle inside the pot unless it’s a dedicated container.
- Add‑on pouch
- Ferro rod, backup lighter, and a small trash bag for wet gear. This “fire kit” stays in an outer pocket for quick access.
Pro tip: Test your entire cook system at home in your backyard during a cold snap. Boil a liter of ice water. Light the stove with gloves on. Simmer for 10 minutes without scorching. If anything fails, you have time to fix or replace — not in a snowstorm at 2 p.m. when hypothermia is on the line.
Conclusion
Building an ultralight winter cook kit is about balancing ounces against reliability. A wide pot, a liquid‑fuel stove (or a winter‑blend canister with strict limits), and a handful of smart accessories will keep you fed and safe. Practice every piece at home before you depend on it in the snow. The goal is not just a lighter pack — it’s a warmer, simpler, and more enjoyable camp meal when the temperature drops.