How to Organize a Backpacking Food Bag So You Can Find Everything Quickly 🎒🥾
Introduction
A backpacking food bag can become surprisingly chaotic.
At home, everything looks organized. You portion meals, pack snacks, count calories, and carefully calculate how much food you need. But after a few days on the trail, the food bag can turn into a jumble of crushed bars, loose drink mixes, half-used dinners, and snacks you forgot you packed.
The problem isn’t necessarily how much food you brought.
It is how easily you can find it.
A well-organized food bag should let you answer simple questions quickly:
Where is breakfast?
Where are today’s snacks?
Where is dinner?
Where did I put the coffee?
Which food needs to be eaten first?
With a simple system, you can spend less time digging through your pack and more time hiking, resting, or enjoying camp. 🌲
1. Organize Food by When You’ll Eat It
The easiest system for most trips is to organize food around time.
Instead of packing everything according to food type, think about the trail day.
For example:
Morning
- Breakfast
- Coffee or tea
- Morning snack
Midday
- Lunch
- Afternoon snacks
- Electrolyte drink mix
Evening
- Dinner
- Dessert or evening snack
This means you don’t have to empty your entire food bag just to find lunch.
If your trip is longer, you can take the same concept one step further by creating daily food bundles.
2. Create Daily Food Packs 📦
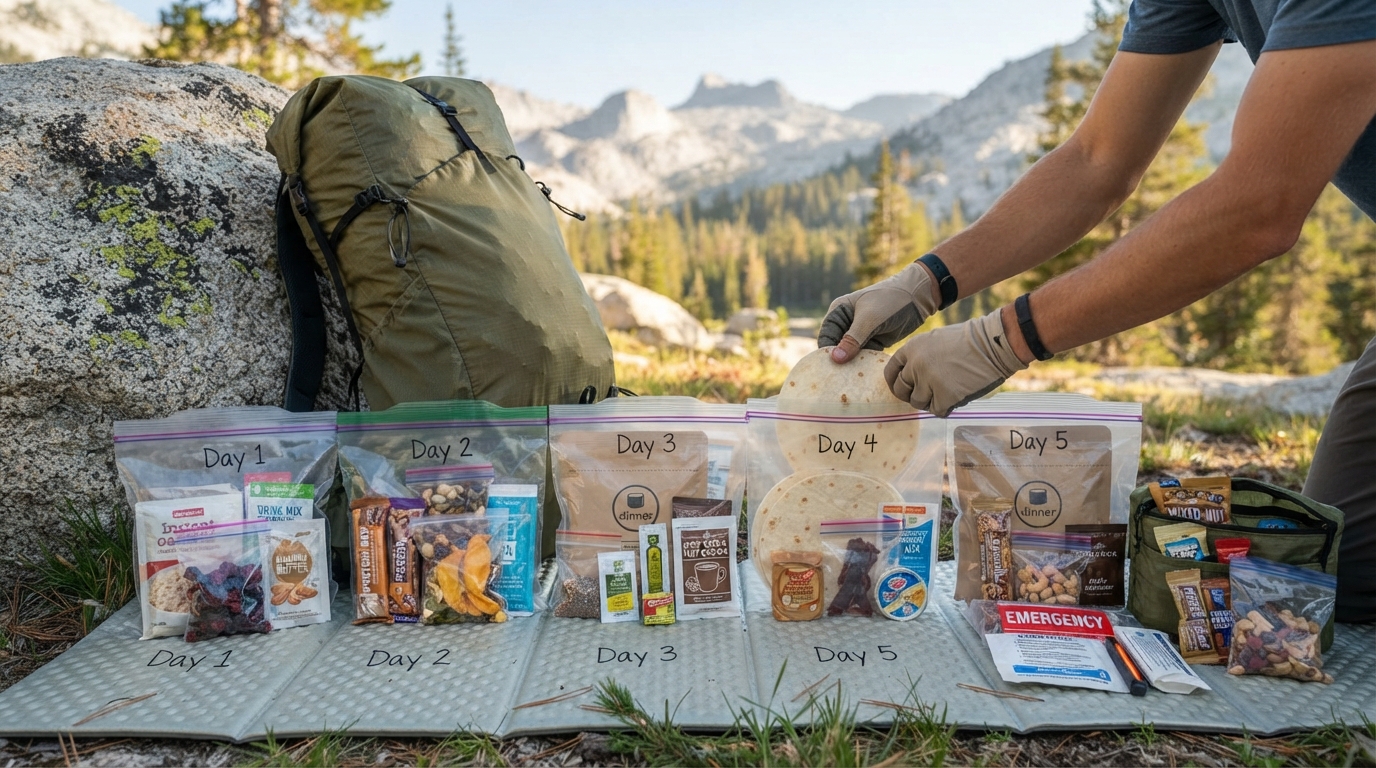
For a multi-day trip, group most of the food you’ll eat each day.
For example:
Day 1
- Breakfast
- Lunch
- Dinner
- Snacks
Day 2
- Breakfast
- Lunch
- Dinner
- Snacks
And so on.
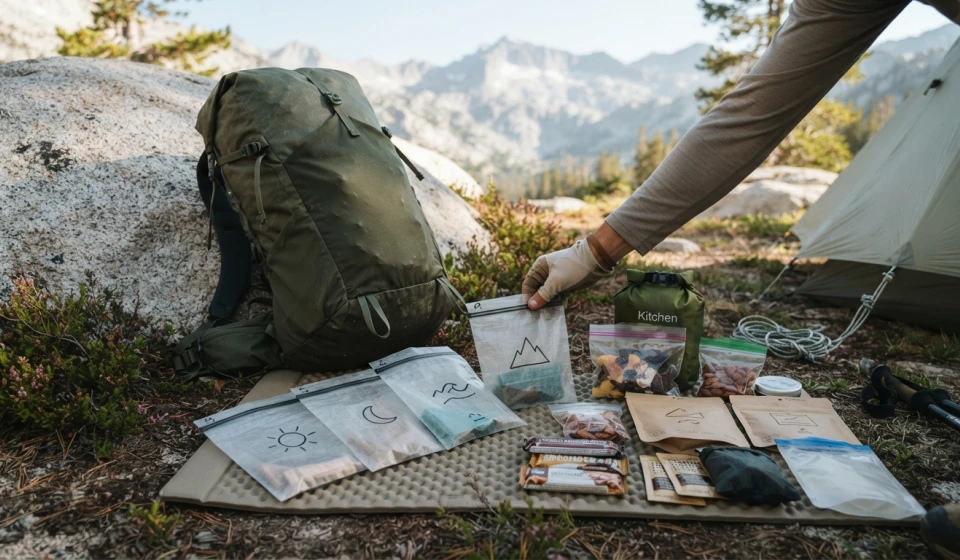
Use lightweight bags or reusable pouches to separate days.
This doesn’t mean every individual item needs its own container.
The goal is simply to create enough separation that you can quickly pull out the day’s food.
Why this works
You don’t need to constantly calculate what you’ve eaten and what belongs to tomorrow.
At camp, you can take out the next day’s food bundle.
In the morning, you already know where breakfast and that day’s snacks are.
3. Keep Frequently Used Snacks Separate 🍫
Daily meal organization is useful, but there is one important exception:
Snacks you eat while hiking should be easy to access.
You probably don’t want to open your main food bag every time you want:
- A granola bar
- Nuts
- Candy
- Jerky
- Dried fruit
- Crackers
- An energy snack
Keep your frequently eaten trail snacks somewhere easily accessible, such as a hip-belt pocket, shoulder-strap pocket, or other secure exterior storage that works with your backpack.
This creates two systems:
Food bag = meals and backup food
Easy-access pockets = today’s snacks
That separation can make a big difference during a long hiking day.
4. Use a Consistent Packing Order
Once you have a system, pack your food the same way every time.
For example:
Top: Breakfast
Middle: Lunch and daily meals
Bottom: Later-trip meals and less frequently accessed food
You could also organize from:
Today → Tomorrow → Later
The specific order matters less than consistency.
When you know where something normally lives, you can find it without unpacking everything.
5. Put Heavy Items Low and Close to Your Back 🎒
Food can become a significant portion of your backpack weight.
As a general backpacking packing principle, heavier items are often best carried close to your back and positioned around the middle of the pack, while very light or bulky items can occupy other areas.
Avoid creating an awkward concentration of heavy food at the very top or far away from your back.
However, accessibility matters too.
A compact food bag can be positioned according to your backpack’s design and your personal packing system.
The goal is a balance between:
Comfort + stability + accessibility
6. Protect Food From Crushing
Not everything needs a hard container.
But some foods are especially vulnerable to getting destroyed inside a backpack.
Examples include:
- Crackers
- Tortillas
- Cookies
- Chips
- Certain bars
- Soft fruit
- Freeze-dried meals in delicate packaging
Put fragile foods where they won’t be compressed by heavy equipment.
A simple reusable bag or lightweight container can also prevent small items from getting scattered.
You don’t need to protect every food item.
Just protect the things you actually care about eating intact. 😄
7. Separate Powdered Items
Drink mixes, electrolyte powders, instant coffee, powdered milk, and similar items have one major problem:
They can make a huge mess if their packaging fails.
Keep powdered products together in a dedicated bag or pouch.
For example:
Drink pouch
- Electrolyte mix
- Coffee
- Tea
- Powdered drink mix
This makes them easy to locate and reduces the chance of powder spreading throughout your food bag.
For longer trips, label individual packets if their appearance is similar.
8. Keep Dinner Ingredients Together 🍲
If your dinner requires multiple components, keep them together.
For example:
Backpacking noodle dinner
- Noodles
- Sauce or seasoning
- Protein
- Vegetable packet
Instead of putting each ingredient somewhere different, create one dinner packet.
This reduces the chance of reaching camp and discovering:
“I have the noodles, but where did I put the seasoning?”
For meals with several components, organization can matter almost as much as the recipe itself.
9. Label Foods for Fast Identification
Labels don’t have to be complicated.
A small piece of tape and a marker can be enough.
Write:
D1 B = Day 1 Breakfast
D1 D = Day 1 Dinner
D2 L = Day 2 Lunch
Or simply:
DAY 1
DAY 2
DAY 3
For meals with unusual preparation instructions, add a short note.
For example:
ADD 1 CUP HOT WATER
This can be especially useful when you’re tired at camp.
10. Put “Eat First” Food Where You Can See It
Some food needs to be eaten earlier than other food.
Maybe something is more fragile.
Maybe you have leftovers from the previous day.
Maybe you’ve opened a package.
Create an eat-first section.
This prevents food from being forgotten at the bottom of your bag.
You can use a small transparent bag or simply put these items at the top.
The principle is similar to organizing a refrigerator:
Food that needs attention first should be easiest to see.
11. Use a Trash Bag From the Beginning ♻️
Your food organization changes as you eat.
Wrappers, empty packets, tea bags, and other waste accumulate.
Carry a dedicated small trash bag.
After eating something, put the wrapper directly into it.
Don’t throw empty packaging back into your food bag.
This keeps your food area cleaner and makes it easier to see what food remains.
At the end of each day, you can also check the trash and food bag together to confirm that nothing important was accidentally discarded.
12. Don’t Repackage Everything Just for Appearance
Repackaging can save space, but it can also create problems.
Removing original packaging may:
- Eliminate preparation instructions
- Remove cooking information
- Make foods harder to identify
- Create food-safety or labeling issues
- Make it difficult to distinguish similar powders
If you repackage food, keep important information available.
A small label can include:
- Food name
- Day
- Meal
- Preparation instructions
- Important allergen information when relevant
The goal is organization, not creating the prettiest food bag.
🧠 13. Build a “Grab-and-Go” Camp System
When you arrive at camp, you should be able to pull out what you need without unpacking your entire backpack.
A useful sequence might be:
Food bag → dinner packet → drink → spoon → trash bag
In the morning:
Breakfast packet → coffee → today’s snacks
This is especially useful when you’re tired, cold, or trying to get moving early.
Your organization system should reduce decisions.
14. Do a Home Test Before Your Trip
Don’t wait until the trail to discover that your food system doesn’t work.
Pack your entire food bag at home.
Then pretend you’re at camp.
Ask yourself:
- Can I find dinner quickly?
- Can I find breakfast without unpacking everything?
- Can I identify each day’s meals?
- Can I separate trash?
- Can I find drink mixes?
- Can I access today’s snacks?
- Can I tell how much food remains?
If the answer is no, reorganize before leaving.
A five-minute test at home can prevent a lot of frustration on the trail.
🎒 A Simple Backpacking Food-Bag Layout
Here’s an easy system to copy:
| Location | What Goes There |
|---|---|
| Hip/shoulder pockets | Today’s snacks |
| Top of food bag | Today’s meals |
| Middle | Next day’s meals |
| Bottom | Later-trip meals |
| Small inner pouch | Drink mixes and coffee |
| Separate pocket | Trash |
| Visible section | Eat-first foods |
Your backpack and food system may require adjustments, but the basic principle remains:
Frequently accessed food should be easy to reach.
🌲 Final Thoughts
A good backpacking food system isn’t about making your pack look perfectly organized.
It’s about reducing friction.
When breakfast is easy to find, today’s snacks are accessible, dinner ingredients stay together, and trash has a dedicated place, small tasks become much easier.
The best system is the one you can remember when you’re tired.
Try organizing your food around when you’ll eat it, how often you’ll access it, and how easily it can be damaged.
Then test the system at home before your trip.
A few simple habits can turn a chaotic food bag into something that feels almost automatic. 🥾🍲✨