How to Divide Backpacking Food Into Daily Meal Bags 🎒🥾
Introduction
Packing food for a multi-day backpacking trip can become surprisingly confusing.
You may know exactly how much food you need, but once everything is mixed together in one large food bag, simple questions start appearing:
“Is this today’s dinner?”
“Did I already eat tomorrow’s snacks?”
“Where is the coffee?”
“How many meals do I actually have left?”
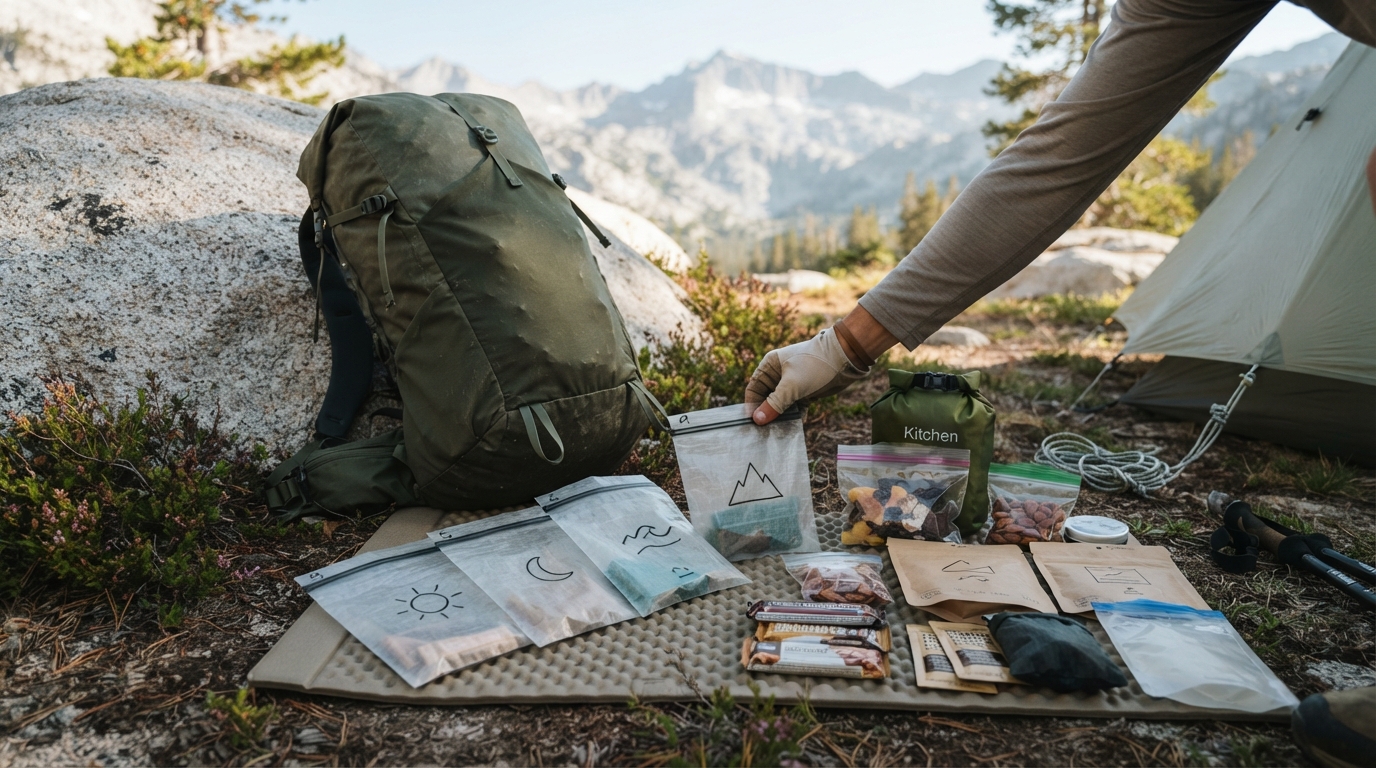
One simple solution is to divide your food into daily meal bags.
Instead of carrying one large collection of food, you create smaller bundles containing the food you’ll eat each day. This can make meal planning easier, reduce digging through your pack, and give you a quick visual check of how much food remains.
The system doesn’t need to be complicated. With a little planning at home, your food can become almost self-organizing on the trail. 🌲
1. Start With Your Complete Meal Plan
Before dividing anything into bags, write down what you expect to eat each day.
For example:
Day 1
- Breakfast
- Morning snack
- Lunch
- Afternoon snack
- Dinner
- Evening snack
Day 2
- Breakfast
- Morning snack
- Lunch
- Afternoon snack
- Dinner
- Evening snack
Continue for every day of the trip.
Include food you actually expect to eat rather than creating an unrealistic “perfect” menu.
If your hiking style involves eating snacks continuously throughout the day, you can simply divide snacks into morning and afternoon portions or place the day’s entire snack supply together.
2. Calculate the Total Food Before Packing
Daily bags work best when they are based on a complete food plan.
For each day, consider:
- Calories
- Protein
- Carbohydrates
- Fat
- Fiber
- Weight
- Cooking requirements
- Water requirements
You don’t necessarily need to calculate every nutrient for every trip.
Calories and total food weight are particularly useful for backpacking because food can become one of the heavier consumable categories in your pack.
The important thing is knowing how much food you actually need before dividing it into bags.
3. Give Each Day Its Own Bag 📦
Once your menu is finalized, create one bag for each day.
For example:
DAY 1
Breakfast
Lunch
Dinner
Snacks
DAY 2
Breakfast
Lunch
Dinner
Snacks
DAY 3
Breakfast
Lunch
Dinner
Snacks
Continue until the end of the trip.
A lightweight reusable bag, zip-top bag, or other suitable food-storage bag can work.
The exact container is less important than having a system that is durable enough for the trip and appropriate for the foods you’re carrying.
4. Label Every Bag Clearly
Don’t depend on memory.
Write:
DAY 1
DAY 2
DAY 3
and so on.
If you’re packing a longer trip, you can make the labels more informative:
DAY 4 — 2,800 CAL
or
DAY 4 — B/L/D + SNACKS
If you have specific cooking instructions, you can add those separately to the meal package.
Clear labeling becomes particularly useful when several bags look identical.
5. Keep Each Day’s Meals Together
A daily bag works best when you can remove it without searching through your entire food supply.
For example:
Day 3 Bag
Breakfast: Oatmeal + powdered milk + dried fruit
Lunch: Tortilla + peanut butter
Snacks: Trail mix + bar
Dinner: Knorr-style side + tuna + seasoning
Now everything needed for that day’s eating is together.
If dinner requires several separate components, keep those components inside the same daily bag or clearly group them together.
This prevents the classic trail problem:
“I have the main meal, but where is the seasoning packet?”
6. Keep Frequently Used Snacks Separate 🍫
There is one important reason not to put every snack inside your daily food bag.
If you’re hiking all day, you may want snacks frequently.
Digging into your main food bag every hour is inconvenient.
Instead, consider keeping today’s easily accessible snacks in:
- A hip-belt pocket
- Shoulder-strap pocket
- Accessible pack pocket
- Other secure location that works with your backpack
At the end of the day, you can restock these pockets from the next daily bag.
This creates a simple system:
Daily bags = food supply
Accessible pockets = today’s trail snacks
7. Decide Whether Breakfast Belongs in the Daily Bag
There are two practical approaches.
Option A: Everything Together
Put breakfast, lunch, dinner, and snacks into one daily bag.
This is the simplest system.
Option B: Breakfast Separate
Some backpackers prefer to organize:
Breakfast bags
Lunch/snack bags
Dinner bags
This can be useful if your morning routine is very different from your evening routine.
Neither approach is universally better.
Choose whichever reduces confusion for you.
8. Make Dinner Packs Especially Clear 🍲
Dinner is often the meal with the most components.
For example:
Dinner
- Noodles
- Seasoning
- Dehydrated vegetables
- Protein
- Sauce packet
Keep them together.
If a meal requires hot water, write the approximate water amount and preparation instructions on the package.
For example:
ADD HOT WATER — REST
The exact preparation instructions should come from the food or recipe you’re using.
This is especially helpful when you’re preparing dinner after a long hiking day and don’t want to remember complicated instructions.
9. Separate Fragile Foods
Daily bags don’t mean you should throw everything together carelessly.
Some foods crush easily.
Protect foods such as:
- Crackers
- Chips
- Cookies
- Tortillas
- Certain snack bars
Place fragile foods near the top or in a location where heavy equipment won’t crush them.
If necessary, use a lightweight rigid container for particularly fragile foods.
Remember that the goal is to protect foods you’ll actually care about eating intact.
10. Use “Eat First” Labels for Perishable Foods
If you’re carrying foods that have limited shelf life, don’t bury them in a daily bag where you’ll forget them.
Place foods that need to be eaten earlier in the trip into the appropriate early-day bag.
For trips involving perishable foods, follow appropriate food-safety practices and consider temperature control and trip conditions.
Shelf-stable foods are generally much easier to manage for longer backpacking trips.
11. Don’t Repackage Without Keeping Important Information
Repackaging can reduce bulk and sometimes make organization easier.
But don’t throw away information you may need.
Keep track of:
- Food name
- Ingredients
- Allergens
- Preparation instructions
- Cooking time
- Important nutrition information
A simple handwritten label can work.
For example:
D2 DINNER
1 packet
ADD HOT WATER
If you’re managing allergies or dietary restrictions, preserve the original ingredient information or another reliable record.
12. Consider a “Day 0” Bag
If you’re spending the night before your hiking trip somewhere other than home, you may want a separate Day 0 bag.
It could contain:
- Travel snacks
- Dinner before the hike
- Breakfast before hitting the trail
- Coffee
- Food for the drive
This prevents you from accidentally opening a carefully organized Day 1 bag before the trip actually begins.
13. Put Daily Bags in Logical Order 🎒
Once everything is packed, organize the daily bags so you can easily identify the next one.
For example:
Top → Day 1
Below → Day 2
Below → Day 3
Bottom → Final days
You don’t necessarily need to put the entire trip’s food at the bottom of your backpack.
Consider your pack’s weight distribution and accessibility.
A good general strategy is to keep the food system organized while placing heavier items in positions that support comfortable and stable carrying.
14. Create an Emergency Food Reserve
Daily meal bags are excellent for organization, but don’t assume that your calculated daily food amount will always be enough.
Trips can change.
You might hike farther than planned, experience bad weather, lose food, or simply become hungrier than expected.
Consider carrying an appropriate emergency food reserve for your trip.
Keep it clearly marked:
EMERGENCY — DO NOT OPEN UNLESS NEEDED
Choose something compact, shelf-stable, and familiar.
The appropriate amount depends on the trip, environment, distance from resupply, and individual needs.
🧠 15. Weigh the Daily Bags
If you’re trying to keep your pack light, weigh each daily food bag after packing.
For example:
| Day | Food Weight | Approx. Calories |
|---|---|---|
| Day 1 | 1.45 lb | 2,800 |
| Day 2 | 1.50 lb | 2,900 |
| Day 3 | 1.55 lb | 3,000 |
| Day 4 | 1.48 lb | 2,850 |
The numbers will depend entirely on your menu.
The purpose of weighing isn’t to make every day identical.
It helps you understand where your food weight is going and whether your plan matches your intended calorie intake.
16. Test the System Before You Leave
Don’t wait until the trail to discover that your organization system doesn’t work.
Lay out all your daily bags at home.
Ask:
- Can I identify every day immediately?
- Does each day contain breakfast?
- Does each day contain lunch?
- Does each day contain dinner?
- Are snacks included?
- Are dinner ingredients together?
- Are cooking instructions available?
- Are fragile foods protected?
- Can I access today’s snacks easily?
- Is there an emergency reserve?
Then perform a simple test:
Pretend you’re at camp.
Grab Day 2.
Prepare the dinner.
If you can find everything quickly without opening the other bags, your system is working.
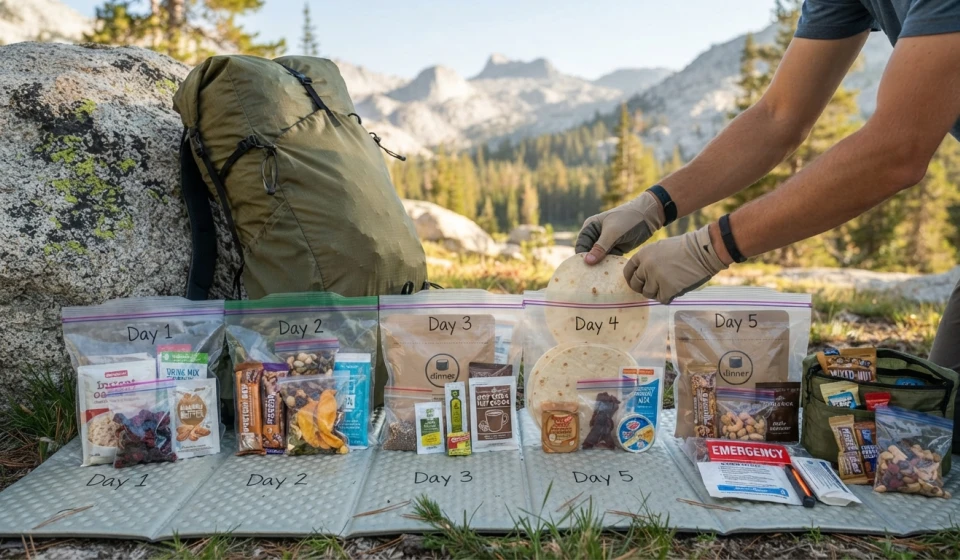
🎒 Example: A 5-Day Food Bag System
A simple five-day system could look like this:
DAY 1
Breakfast + lunch + dinner + snacks
DAY 2
Breakfast + lunch + dinner + snacks
DAY 3
Breakfast + lunch + dinner + snacks
DAY 4
Breakfast + lunch + dinner + snacks
DAY 5
Breakfast + lunch + dinner + snacks
Separate:
- Today’s accessible snacks
- Drink mixes
- Emergency food
- Trash bag
At the end of each day, discard or store empty packaging and move the next day’s food into your accessible system.
🌱 Final Thoughts
Dividing backpacking food into daily meal bags isn’t about making your food system complicated.
It’s about making decisions easier.
Instead of searching through one giant food bag, you know exactly where today’s meals are. Instead of wondering whether you’ve packed enough, you can quickly count your remaining daily bags. Instead of searching for individual dinner ingredients, you can keep them together.
The simplest system is usually the one you’ll actually use:
Plan the menu → divide by day → label clearly → protect fragile foods → keep today’s snacks accessible → test everything at home.
Once you’ve done it a few times, packing for a multi-day trip becomes much more predictable. 🥾🌲🍲