How to Choose the Right Stove for Your Thru-Hike
Choosing the right stove for a thru-hike can mean the difference between a hot meal under the stars and a frustrating battle with a finicky burner. Your stove is your mobile kitchen, and the wrong choice can waste fuel, add unnecessary weight, or leave you hungry. This guide breaks down the critical factors, compares fuel types, and gives route-specific advice so you can confidently pick the perfect cooking system for your next long-distance trek.
Key Factors to Consider Before Buying a Thru-Hiking Stove
Before you even look at weights or prices, you need to answer three fundamental questions about your hike. The answers will narrow down your options faster than any product review.
Trail Length and Resupply Frequency
How many days between resupplies? On the Appalachian Trail (AT), towns are never more than a few days apart, so you can carry small fuel canisters or alcohol and replenish often. On the Pacific Crest Trail (PCT), especially in the desert sections, you might go 5–7 days without a resupply, demanding either lightweight fuel or a stove that can handle bulkier fuel loads. The Continental Divide Trail (CDT) features the longest stretches, sometimes 8–10 days, where every gram of fuel weight matters.
Cooking Frequency and Style
Are you the type who boils water for instant mashed potatoes and pours it into a freezer bag, or do you crave real cooking like simmering a pasta sauce or baking a tortilla pizza? The more complex your meals, the more you need a stove with good simmer control and enough fuel efficiency to last. Most thru-hikers adopt the “just-boil-water” method to save fuel and time, but if you need variety, factor that in.
Environmental and Weather Conditions
Wind is the number one enemy of stove efficiency. Alcohol stoves, for example, become nearly useless in a moderate breeze without a windscreen. Canister stoves (isobutane-propane) lose pressure in cold temperatures, making them sluggish below freezing. If you’re hiking the CDT across the high Rockies, where snow and sub-zero mornings are common, a liquid fuel stove might be your only reliable option. Solid fuel tablets (Esbit) are unaffected by cold but produce a weak flame that struggles in wind and takes forever to boil a cup of water.
“I switched from a canister stove to an alcohol stove on the PCT after day 200—and instantly regretted it during a windy dinner on a ridge. Learn from my mistake: match your stove to the climate, not just the weight.” — Mike “Ramble” O’Brien, triple-crown finisher
Alcohol, Canister, and Solid Fuel Stoves Compared
Each fuel type has a passionate following. Here’s an honest, practical breakdown to help you decide.
| Feature | Alcohol Stoves | Canister Stoves (Isobutane) | Solid Fuel (Esbit/Hexamine) |
|---|---|---|---|
| Weight (stove + fuel for 5 days) | Very low (~4 oz total) | Moderate (~8 oz total) | Low (~5 oz total) |
| Boil time (1 cup water) | 8–12 minutes | 3–4 minutes | 6–8 minutes |
| Wind resistance | Poor without windscreen | Good with windscreen | Poor (flame easily blown) |
| Cold weather performance | Excellent (fuel is liquid) | Poor below 20°F | Excellent (but slow) |
| Availability on trail | Common (denatured alcohol at hardware stores) | Very common (every outdoor store) | Rare outside Europe/Specialty shops |
| Simmer control | None (on/off) | Good (adjustable flame) | None |
| Cost per day (fuel) | $0.60–$1.00 | $1.00–$1.50 | $1.20–$1.80 |
When to Choose Each Stove Type
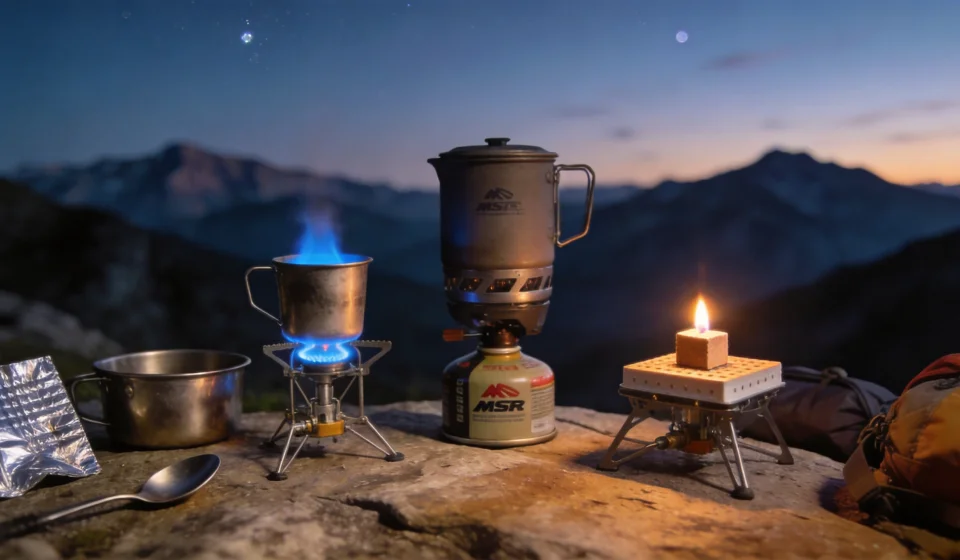
- Alcohol stoves (e.g., DIY pop-can, Trangia, Vargo Triad) are perfect for summer hikes on the AT or PCT where you can resupply often and cook in sheltered campsites. They are whisper-quiet, ultralight, and cheap. Downsides: no simmer, messy fuel spills, and many national parks (especially in California) temporarily ban alcohol stoves during fire season—check regulations.
- Canister stoves (e.g., MSR PocketRocket 2, Soto WindMaster, Jetboil systems) are the most popular choice for thru-hiking because they’re fast, reliable in moderate wind, and easy to use. They excel for AT and PCT hikers who don’t face extreme cold. Look for a stove with a wide burner head and a piezo igniter to reduce fiddling.
- Solid fuel tablets (e.g., Esbit) appeal to ultra-minimalists. They’re lightweight, compact, and require no liquid or pressurized canister. But they leave a sticky black residue on your pot, take forever to boil, and are almost impossible to use in wind without a dedicated stand. Best for short trips or as a backup.
Stove Recommendations for America’s Big Three Thru-Hikes
Each long-distance trail has distinct conditions that favor certain stove systems. Here’s what works best for the AT, PCT, and CDT.
Appalachian Trail (AT) – Green Tunnel, Frequent Resupply
The AT runs from Georgia to Maine, with shelters every 5–10 miles and towns every 3–5 days. The biggest challenges are humidity, rain, and occasional cold in the White Mountains. A lightweight canister stove is the sweet spot here.
- Recommended: MSR PocketRocket 2 or Soto WindMaster
- These compact canister stoves boil water fast and tuck into a pot. Pair with a 100g fuel canister that lasts 3–4 days. If you want even lighter, consider an alcohol stove like the Vargo Titan, but accept that you’ll need to cook under shelter or use a windscreen (which is often allowed in AT shelters).
- Alternative: Jetboil Flash
- If you prioritize speed and integrated efficiency, the Jetboil system saves fuel but adds weight and bulk. Many AT hikers love it for the simplicity, especially in rainy shelters.
Pacific Crest Trail (PCT) – Desert, Mountains, and Snow
The PCT spans 2,650 miles from Mexico to Canada through California, Oregon, and Washington. You’ll face hot desert stretches (high fire risk, wind) and high Sierra passes with freezing temperatures. A canister stove works for most sections, but carry an adapter for inverted canister use in cold, or switch to an alcohol stove for the desert to save weight.
- Desert sections (100–700 miles): Alcohol stoves shine here because daytime temperatures are warm and winds are usually manageable with a windscreen. Use a homemade pop-can stove to save ounces. But beware: in Southern California, fire bans often forbid alcohol stoves during dry months; always call the local ranger station.
- Sierra Nevada (700–1,000 miles): Switch to a canister stove like the Soto WindMaster with a 4-flex pot. Temperatures drop below freezing at night; you can “warm” the canister in your sleeping bag before cooking, or use an inverted canister system like the MSR Reactor if you’re dealing with snow melt.
- Pacific Northwest (1,000–2,650 miles): Wet, cold, and windy. A canister stove with a good windscreen is essential. Some hikers carry an alcohol stove as a backup for rainy evenings when they can cook inside their tent vestibule (with extreme caution).
Continental Divide Trail (CDT) – Remote, Windy, Cold
The CDT is the least developed of the big three, with long stretches between towns (8–10 days) and extreme weather—snow in July, sub-zero temperatures, and relentless wind. Reliability trumps weight here. Liquid fuel stoves (white gas) are the gold standard, but modern canister stoves with cold-weather tricks can work if you’re careful.
“I started the CDT with a canister stove and switched to a liquid fuel MSR WhisperLite Universal after the first snowstorm in the Weminuche Wilderness. It was heavier, but never failed me when I needed to melt snow for water.” — Sarah “Starlight” Torres, 2023 CDT finisher
If you want to stick with canisters, use a stove that allows inverted canister operation, like the MSR WindBurner or Kovea Spider. Inverted use feeds liquid fuel to the burner, maintaining pressure in cold. Carry multiple canisters and confirm resupply points carry isobutane (some remote towns don’t). The only truly worry-free option for pure meltwater reliability is a liquid fuel stove like the Primus OmniLite Ti or the classic MSR WhisperLite Universal (which also burns canisters).
Practical Advice from the Trail
Beyond the fuel type, a few habits can make or break your stove experience.
Test Your System Before the Hike
Don’t launch on a 2,000-mile walk with a stove you’ve never lit. Simulate trail conditions: cook a full meal in your backyard on a windy day, note how much fuel you used, and measure boil time. Write down your fuel estimation formula: a typical rule of thumb is 0.5 oz of alcohol per boil, 1 canister per 4–6 days for one person, or 2 tablets per boil for Esbit. Adjust based on your cooking habits.
Bring a Stove Support and Windscreen
A stable pot support is critical—alcohol stoves need a separate pot stand, while most canister stoves have built-in legs. For alcohol or solid fuel, a titanium stand like the Toaks Siphon Burner Stand or a DIY wire hanger works. A wind screen (aluminum foil or a commercial foldable shield) can cut boil time in half for alcohol stoves. Never use a windscreen with canister stoves unless the stove specifically allows it—enclosing the canister can cause overheating and explosion.
Fire Safety and Regulations
Always check local fire restrictions. Alcohol and solid fuel stoves are often banned during drought conditions. Canister stoves with a shut-off valve are usually allowed year-round, but some national forests also restrict them in extreme fire danger. Carry a lightweight foam pad to place under your stove to prevent scorching rock or soil. And never cook inside your tent—the risk of carbon monoxide poisoning or a fire nightmare is real.
Fuel Cache Planning
For the CDT or other remote routes, consider mailing fuel to yourself at resupply points. Gas station fuel (Coleman fuel, white gas) is widely available in small towns. For canisters, purchase them at outdoor stores ahead of time and ship to post offices. Some hostels and trail angels stock a variety. Always call ahead to confirm.
Conclusion
There is no single best stove for all thru-hikes—only the best stove for your hike. Start by analyzing trail length, weather, resupply cadence, and cooking needs. For most AT and PCT hikers, a lightweight canister stove wins on speed and convenience. For CDT veterans, liquid fuel or an inverted canister system is the safe bet. Whichever you choose, test it before you go, respect fire regulations, and enjoy the ritual of a hot meal after a long day on the trail.