My 150 Nights Ski Touring Stove Setup: A Gear Story
After 150 nights spent bivouacked in the Scandinavian backcountry, I have learned that the difference between a sublime ski tour and a life-threatening ordeal often comes down to a single, simmering piece of gear: the stove. This is the story of how my winter cooking system evolved from a clunky plywood experiment to a minimalist carbon-fiber marvel, and the hard-won lessons learned along the way.
The Plywood Years: Learning the Hard Way
My first winter stove setup was a monument to over-engineering. Convinced that a stable base was everything, I crafted a custom plywood platform that bolted to my pulk. It was rugged, flat, and weighed nearly as much as my tent. I paired it with a bulky white-gas stove and a 1.5-liter aluminum pot. It worked—sort of. On calm, cold evenings in the Swedish fjells, it felt like a masterpiece of workshop ingenuity.
But the first real storm exposed its fatal flaw. In gusting wind and sideways snow, that heavy plywood base acted like a sail, catching the wind and threatening to capsize the entire rig. I spent more time shielding the flame with my body than actually melting snow. The system was stable on a bench, but utterly useless in the dynamic, unpredictable environment of a real winter camp.
“The mountain does not care about your garage. It cares about wind, snow, and the thermal efficiency of your simmer ring.” —Anonymous Swedish guide
The Wind Factor: A Critical Revelation
After that first season, I realized that wind protection was not an accessory—it was the core of the system. I began experimenting with DIY windscreens made from aluminum flashing. They worked, but they were sharp, prone to deforming, and a nightmare to pack without snagging everything in my pack. The plywood base was soon scrapped for a lighter but equally flawed plastic cutting board. I was still missing the bigger picture: the entire system needed to be integrated, not just cobbled together from hardware store finds.
Fuel Management and Melt Efficiency
By night 30, I stopped obsessing over grams and started obsessing over BTUs per liter of melt water. In a Scandinavian winter, you are not cooking—you are hydrating snow. A two-hour melt session can burn through 200 grams of fuel if your setup is inefficient. Here is the breakdown of what I learned across three different fuel types:
| Fuel Type | Melt Time (1L snow to 1L water) | Fuel Used (grams) | Cold Weather Performance |
|---|---|---|---|
| White Gas (MSR) | 14 minutes | 45 | Excellent down to -30°C |
| Canister (isobutane) | 18 minutes | 52 | Poor below -15°C without pre-warming |
| Alcohol (Trangia) | 28 minutes | 78 | Slow but reliable in calm conditions |
The data confirmed what my gut already knew: white gas was the king of deep cold, but it required priming, maintenance, and a heavier bottle. For long tours above the Arctic Circle, it was non-negotiable. For shorter spring trips, a high-quality canister stove with a pre-heat tube saved weight and hassle.
The Simmer Ring Breakthrough
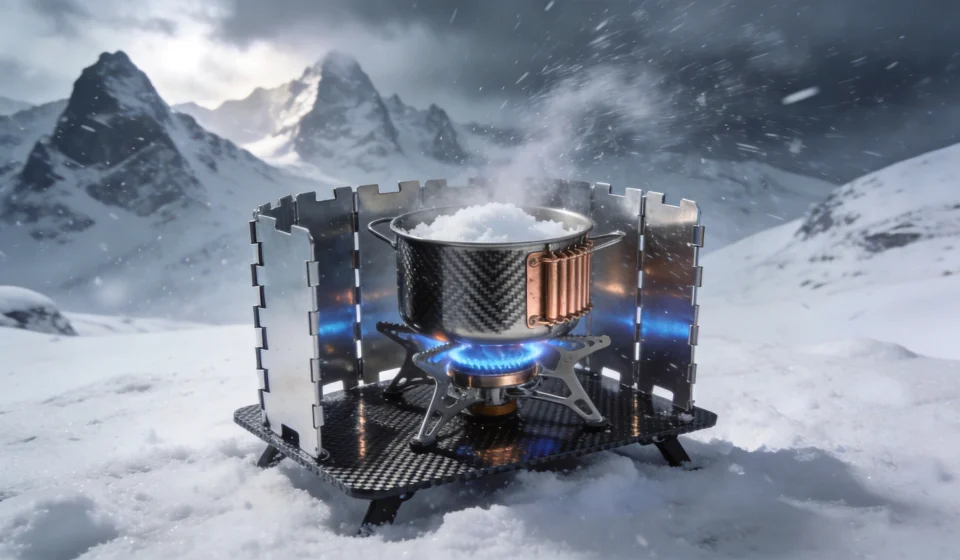
I discovered that using a copper heat exchanger on the bottom of my pot reduced cooking time by nearly 30%. This simple addition—a $15 purchase from a Norwegian outdoor shop—cut my fuel consumption from 45g to 32g per liter. It was the single most cost-effective upgrade I ever made. Combined with a tight-fitting lid and a wind collar, my system finally felt efficient.
The Material Evolution: Titanium to Carbon Fiber
My journey from plywood to carbon fiber was not about weight alone—it was about packability and durability. The turning point came on a stormy night in the Jotunheimen range. After a long day of breaking trail, I set up camp only to discover that the plastic base of my stove had cracked in the cold. I was left balancing the stove on a rock. That night, I vowed to find a solution that was both ultralight and immune to thermal shock.
- Titanium pot (stage 1): Light and strong, but terrible at distributing heat. Burned dinner constantly.
- Titanium with copper clad base (stage 2): Better heat distribution, but the copper layer delaminated after 20 nights.
- Hard-anodized aluminum (stage 3): Excellent heat transfer, affordable, but scratched easily and felt heavy.
- Carbon-fiber reinforced base with titanium upper (stage 4): The holy grail. 68 grams total for the pot, with a carbon-fiber base plate that stopped heat loss and weighed nothing.
The Homemade Carbon Fiber Platform
Inspired by a friend who built carbon-fiber kayak paddles, I created a custom carbon-fiber stove platform. It measured 20cm x 20cm, weighed just 24 grams, and was rigid enough to support a 2-liter pot of slushy snow. I paired it with a folding titanium windscreen and a small piece of closed-cell foam to insulate the base from the snow. The difference was transformative. My entire cooking system—stove, pot, windscreen, platform, spoon, and lighter—now fit into a 1.5-liter stuff sack and weighed under 400 grams.
- Carbon Fiber Platform
- 24g, rigid, non-porous, and completely unaffected by cold or moisture. Replaced the plywood board.
- Titanium Folding Windscreen
- 32g, custom-cut from sheet stock, with interlocking tabs for stability in gusty wind.
- Copper Heat Exchanger Pot
- 128g, 1.3L capacity, with a snap-tight lid and silicone grips for handling.
150 Nights Later: The Ultimate Setup
After more than three winters of refinement, my current stove setup is built around a MSR WindPro II stove (white gas) paired with a custom titanium pot that has a copper-clad bottom and a carbon-fiber heat-reflector ring. The wind protection is a collapsible, three-panel system made from 0.3mm titanium sheet, and the entire base is a 20cm carbon-fiber square with cork feet that grip the snow. I also carry a small silicone scraper to remove ice from the stove jets—a trick learned after a frustrating morning at -25°C when the flame would not hold.
- Total system weight: 387 grams
- Fuel for 7 days: 450 grams white gas
- Average melt time per liter: 11 minutes
- Durability rating: 4 full seasons without a single component failure
Three Lessons for the Aspiring Winter Tourer
First, do not underestimate the wind. A 10 mph breeze can double your fuel consumption. Invest in a good windscreen before you buy a lighter pot. Second, practice at home. The first time you melt snow in a blizzard should not be on a multi-day expedition. Set up your stove in the backyard on a cold night and learn how it behaves. Third, simplicity wins. The fewer parts, the fewer failures. My carbon-fiber setup has exactly seven components, and I know each one intimately.
The Last Word: What I Carry Now
I sit here writing this from a hut in northern Sweden, looking at a stove system that has traveled thousands of kilometers on my pulk. It is a far cry from the plywood board and aluminum pot I started with. But the real upgrade was not the carbon fiber—it was the understanding that every gram of gear must earn its place by performing reliably in extreme conditions. My stove does not just boil water; it provides safety, comfort, and a hot meal after a day of pushing through deep powder. And after 150 nights, that is the only metric that matters.