How to Save Water on Backpacking Meals: A Guide
Water is the heaviest item in your pack, yet most backpackers carry far more than they need by wasting it on meals. This guide breaks down the difference between cooking water and hydration water, then shares field-tested techniques like cold-soaking, minimal-water cooking, and rehydrating directly at water sources. By rethinking how you prepare food, you can shave pounds off your pack while staying safe and well-fed on the trail.
Understanding the Two Waters: Hydration vs. Cooking
Before you can save water, you need to distinguish between the water your body must drink and the water you choose to pour into your pot. Hydration water—typically 3–4 liters per day on a moderate hike—is non-negotiable. Dehydration leads to muscle cramps, headaches, and impaired decision-making. Cooking water, on the other hand, is a convenience. It rehydrates your food, but you have enormous flexibility in how you use it.
Many beginners cook their pasta in a full 2-cup boil, then dump the leftover starchy water. That’s roughly half a pound of wasted water you carried for hours. Experienced hikers know that you can cut cooking water by 50–70% without sacrificing texture or nutrition. The key is to match the technique to the food.
“I used to think boiling a full pot was the only way to cook on trail. Then I cold-soaked my couscous for 20 minutes and realized I’d been carrying an extra liter of water for nothing.” — Jenny, Pacific Crest Trail thru-hiker
Cold-Soaking: Zero Fuel, Zero Boil, Maximum Savings
Cold-soaking eliminates the need to boil water entirely. You simply add cold or room-temperature water to your dehydrated meal, seal it in a jar or freezer bag, and let time do the work. This technique saves both the water that would evaporate during boiling and the fuel required to heat it—plus you can eat immediately without waiting for a stove to cool.
What Foods Work Best for Cold-Soaking?
Not every meal is a candidate. Ideal cold-soak foods are thin, pre-cooked, and porous:
- Instant oatmeal (rolled or quick oats)—soak 15–20 minutes
- Couscous (fine grain)—soak 15 minutes
- Instant mashed potatoes—soak 10 minutes
- Ramen noodles (crushed into small pieces)—soak 30 minutes
- Dehydrated refried beans—soak 45–60 minutes
- TVP (Textured Vegetable Protein)—soak 20 minutes
Avoid thick pasta, brown rice, or whole lentils—these require heat to soften. If you’re on a long traverse and want variety, you can pre-cook and dehydrate your own pasta meals at home, then cold-soak them on trail.
Cold-Soaking Technique
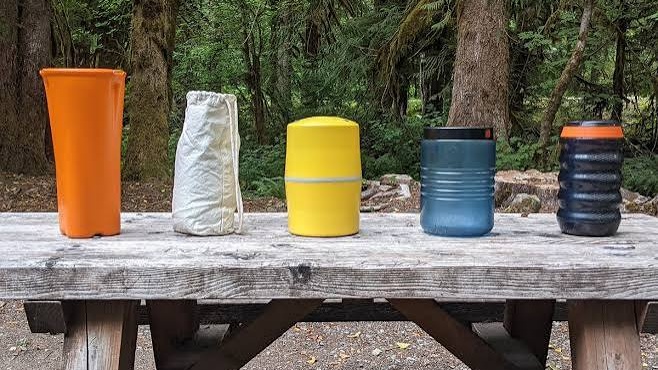
- Place dry food in a wide-mouth jar (e.g., a Talenti gelato jar) or a sturdy freezer bag.
- Add just enough water to cover the food—about 1:1 by volume for most items. Too much water leaves you with soup and wasted weight.
- Seal, shake, and let sit for the time listed above. Give it a stir halfway through.
- If the food is still crunchy, add a splash more water and wait 5 more minutes.
Cold-soaked food will be cooler than a hot meal, which some hikers find unappealing in winter. But on a hot desert traverse, a cold-soaked lunch is a blessing. And because you never heat the water, you save the weight of a stove, fuel canister, and pot—a total of roughly 12–16 ounces.
Minimal-Water Cooking: When You Need Heat
If you crave a warm dinner or are hiking in cold conditions, you still don’t need a full boil. The principle of minimal-water cooking is simple: use the exact amount of water that the food will absorb, and no more. Most freeze-dried meals require 1½ cups of water, but you can often get away with 1 cup if you let the food sit covered for an extra 5 minutes after cooking.
The “No-Drain” Method
Traditional pasta and rice dishes instruct you to cook in plenty of water and then drain. That is a huge water waste. Instead, try this:
- Add 1¼ cups of water per cup of dry pasta (instead of 3–4 cups). Bring to a boil, then immediately remove from heat, cover, and let steam for 10–12 minutes. The pasta absorbs all the liquid, leaving you with a saucy, fully cooked dish.
- For instant rice (minute rice), use a 1:1 ratio. Boil, turn off heat, and wait 5 minutes. No water left behind.
A silicone pot cozy (a simple insulating sleeve) is a lightweight tool that helps trap heat during the resting phase, saving both water and fuel. You can also wrap your pot in a down jacket for the same effect.
Stoveless “Simmer” in a Thermos
If you own a wide-mouth insulated food jar (such as a Hydro Flask or Yeti), you can bring water to a boil, pour it into the jar with your dry food, seal it, and let it cook for 20–30 minutes without any additional heat. This uses exactly the water required—no evaporation, no splashing, no waste. It’s ideal for oatmeal, couscous, and even some thin noodles.
Rehydrating at the Water Source: Carry Wet, Not Dry
Most backpackers carry dehydrated food and add water later. But you can reverse that logic: add water at a known source, then carry the rehydrated meal. This method is perfect for day hikes near a creek or for the last stretch before a dry camp.
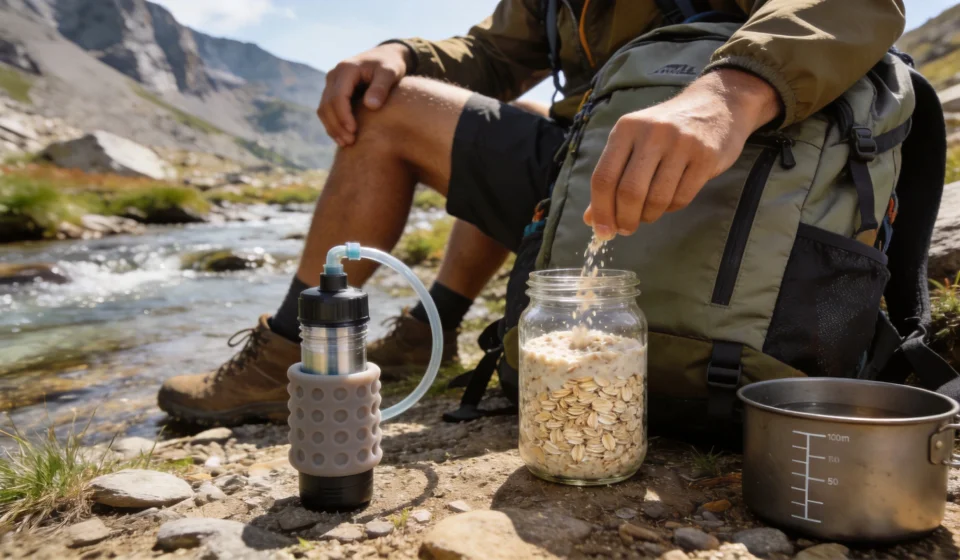
Here’s the trick: Fill a freezer bag or reusable silicone pouch with your dry meal, then add cold water directly from the stream (treat it first with a filter or tablets). Seal, knead, and let it sit while you filter enough drinking water for the rest of the day. After 20–30 minutes, pour off any excess water—now you’re carrying food weight only, not the extra water that would have been absorbed anyway.
Practical example: A typical 5-ounce serving of freeze-dried chili mac needs 10 ounces of water to rehydrate. If you add that water at a reliable creek, you’re carrying only those 5+10 = 15 ounces of total meal weight instead of 5 ounces of dry food plus a separate 10 ounces of water (which you’d have to carry from the same creek). The difference? You eliminate the separate water bottle weight, plus you don’t need to measure portions repeatedly.
Caveat: This technique works best when you’ll eat the meal within 2–3 hours. Rehydrated food left in a hot pack for a full day can spoil—but in cool weather or with freeze-dried vacuum-sealed packs, it’s safe for longer.
Meal Planning to Minimize Water Carry Weight
Every ounce of water you carry translates to ounces of extra effort. The smartest way to reduce water weight is to choose meals that naturally require little or no added water. Below is a comparison of common backpacking foods and their water-to-food ratios.
| Food Item | Water Needed (ml) | Rehydration Method | Weight Savings Potential |
|---|---|---|---|
| Instant oatmeal | 150–200 | Cold soak or hot | High – no boiling needed |
| Couscous | 120–150 | Cold soak ideal | Very high |
| Instant mashed potatoes | 180–250 | Cold soak or hot | High |
| Ramen noodles | 250–300 | Cold soak (crushed) | Moderate – long soak |
| Dehydrated refried beans | 200–250 | Cold soak 45 min | Moderate |
| Standard pasta (spaghetti) | 400–500 | Hot only, no-drain method | Low unless using no-drain |
| Brown rice (instant) | 200–250 | Hot, 1:1 ratio | Moderate |
| Freeze-dried meal (typical) | 300–400 | Hot or cold soak (brand dependent) | Moderate to high |
Four Menu-Planning Principles
- Prioritize cold-soak-friendly meals for breakfast and lunch. Oatmeal, granola with milk powder, couscous salads, and bean wraps all rehydrate without heat.
- Add high-energy fats like olive oil, ghee, or nut butter to your meals. Fats don’t require water to digest and boost calorie density—meaning you can carry less food weight overall, which indirectly reduces the water you need for that food.
- Pack “no-cook” elements such as tortillas, hard cheese, salami, and dried fruit. These require zero water preparation and provide quick energy.
- Plan to refill water at known sources. If you know you’ll pass a stream at 4 p.m., you can carry only 1 liter of drinking water for the afternoon, then rehydrate your dinner at the source (using the technique from the previous section). This can save carrying an extra 1–2 pounds of water.
Sample One-Day Menu with Minimal Water
- Breakfast (cold-soaked)
- Instant oatmeal (80g dry) + 150ml water (cold-soaked in jar) + handful of walnuts. Water used: 150ml. No fuel.
- Lunch (no-cook)
- Two tortillas (50g each) + 2 tbsp almond butter + one small apple. Water used: 0ml.
- Dinner (minimal-water hot meal)
- Couscous (100g dry) + 120ml water + 1 tbsp olive oil + dehydrated veggies. Boil water, pour in jar, wait 10 min. Water used: 120ml. Fuel: about 5g.
- Snacks
- Trail mix (100g), beef jerky (30g), dark chocolate (20g). Water used: 0ml.
Total cooking/hydration water for meals: 270ml (less than one cup). The rest of your daily water (2–3 liters) is drinking water only. By contrast, a typical hiker who boils pasta with drain-water would easily use 500–700ml for dinner alone.
Advanced Tips: Reduce Evaporation and Collect Condensation
Even with careful measuring, some water is lost to steam. Use a lid at all times when heating water, and lower the heat (or the distance from the flame) to just maintain a simmer. A windscreen helps reduce boil time, which also cuts water loss. If you cook inside a tent vestibule (with ventilation), the condensation on the walls can be collected with a sponge—though this is more of a survival trick than a daily practice.
Another pro move: Bring a graduated water bottle or mark your pot with measurement lines (e.g., 1 cup, 1½ cups). Guessing leads to over-pouring. Many backpackers add extra water “just in case,” then pour it out. That’s wasted energy and weight.
Conclusion
Water is weight, and every unused drop you carried is a step wasted. By understanding the difference between hydration and cooking water, mastering cold-soaking, rehydrating at sources, and choosing water-savvy meals, you can cut your total water carry by 30–50% without sacrificing nutrition or enjoyment. Start with one technique—try cold-soaking your breakfast on your next trip—and build from there. Your knees and your back will thank you.