How to Create a Printable Backpacking Meal Plan With Calories, Weight, and Portions 🎒🥾
Backpacking food planning gets much easier when you stop thinking about food as a pile of packages and start treating it like a system.
You need to know:
- How many days you’re hiking
- How many calories you are planning to carry
- How much each food weighs
- How much of each food belongs in one portion
- What you will eat for breakfast, lunch, dinner, and snacks
- How much water and cooking fuel your meals require
A printable meal plan puts all of that information in one place.
Instead of opening your pantry and guessing, you can build your menu, calculate the totals, weigh everything, and check each day’s food before it goes into your backpack. 📋
The result is a food plan that is easier to shop for, easier to pack, and much harder to accidentally overpack.
🧭 Start With Your Trip
Before making a spreadsheet or printing a checklist, establish the basic conditions.
Write down:
Trip length: ______ days
Number of hikers: ______
Daily calorie target: ______
Cooking method: ______
Expected mileage: ______
Resupply available: Yes / No
Food-storage requirements: ______
Your calorie target should be personal rather than copied from another hiker.
REI gives approximately 2,500–4,500 calories per person per day as a broad backpacking planning range, but actual needs vary with body size, activity level, terrain, mileage, and other factors.
For example, if you decide that 3,200 calories per day is an appropriate planning target for your trip:
3,200 × 4 days = 12,800 planned calories
That’s simply a planning calculation, not a recommendation that everyone should eat exactly 3,200 calories.
📊 Build the Printable Meal-Plan Table
The most useful printable format is simple.
Create columns for:
| Day | Meal | Food | Portion | Calories | Weight |
|---|---|---|---|---|---|
| 1 | Breakfast | Oatmeal | 2 packets | 600 | 6 oz |
| 1 | Snack | Trail mix | 2 oz | 300 | 2 oz |
| 1 | Lunch | Tortilla + nut butter | 1 portion | 500 | 4 oz |
| 1 | Snack | Energy bar | 1 bar | 250 | 2 oz |
| 1 | Dinner | Dehydrated meal | 1 meal | 700 | 5 oz |
| 1 | Dessert | Chocolate | 1 portion | 200 | 1 oz |
The numbers above are examples only.
For your actual plan, use the nutrition information and measured weight of the specific foods you are packing.
This distinction matters because two foods that look similar can have very different calories and weights.
🔢 Calculate Your Daily Calories
Once you’ve entered every meal, add the calories for each day.
For example:
Breakfast: 600 calories
Morning snack: 300 calories
Lunch: 500 calories
Afternoon snack: 250 calories
Dinner: 700 calories
Dessert: 200 calories
Daily total = 2,550 calories
You can then compare that number with your personal target.
If your target is 3,200 calories, you know you have a 650-calorie gap to address.
That is much better than discovering halfway through the trip that you consistently packed less food than you intended.
⚖️ Calculate the Food Weight
Do the same thing with weight.
If the day’s food weighs:
- Breakfast: 6 oz
- Snacks: 4 oz
- Lunch: 4 oz
- Dinner: 5 oz
- Dessert: 1 oz
Then:
6 + 4 + 4 + 5 + 1 = 20 oz
That’s 1.25 lb of food for that day.
Repeat the calculation for every day.
REI notes that backpacking food commonly falls around 1.5–2.5 pounds per person per day, although the appropriate amount varies with calorie needs and the individual trip.
Don’t treat that range as a required target. Your actual food weight depends on your menu, calorie requirements, and the density of your foods.
🥜 Add Calories-per-Ounce
If you’re trying to reduce pack weight, add one more column:
Calories per ounce
The calculation is:
Calories ÷ ounces = calories per ounce
For example:
500 calories ÷ 4 oz = 125 calories per ounce
This lets you quickly identify foods that provide a lot of energy for their weight.
REI suggests 100 calories per ounce as a useful starting point, with 125 calories per ounce or more being a target some ultralight backpackers use.
High-calorie foods can include nuts, nut butters, seeds, dried fruit, oils, energy bars, and certain cheeses.
But don’t optimize every food exclusively around this number.
A backpacking menu also needs variety, protein, carbohydrates, fats, convenience, and foods you actually want to eat.
🍳 Divide the Plan Into Four Sections
A printable plan becomes easier to use when every day follows the same structure.
🌅 Breakfast
Choose foods that are easy to prepare when you’re still waking up.
Examples:
- Instant oatmeal
- Granola
- Powdered milk
- Dried fruit
- Nuts
- Breakfast bars
- Instant coffee
- Tea
🥪 Lunch
Lunch can be hot, cold, or simply eaten gradually while hiking.
Examples:
- Tortillas
- Nut butter
- Tuna or other shelf-stable protein
- Crackers
- Jerky
- Hard cheese when appropriate
- Bars
- Trail mix
🥜 Snacks
Divide these into convenient portions.
Examples:
- Nuts
- Trail mix
- Chocolate
- Dried fruit
- Energy bars
- Pretzels
- Seeds
🍜 Dinner
Dinner can be the most substantial meal and the time when you use your stove.
Examples:
- Instant rice bowls
- Couscous
- Dehydrated pasta
- Instant potatoes
- Ramen
- Dehydrated vegetables
- Freeze-dried or dehydrated meals
REI recommends starting meal planning with dinners because they’re often the meals hikers sit down to eat, while also considering easier meals on high-mileage days.
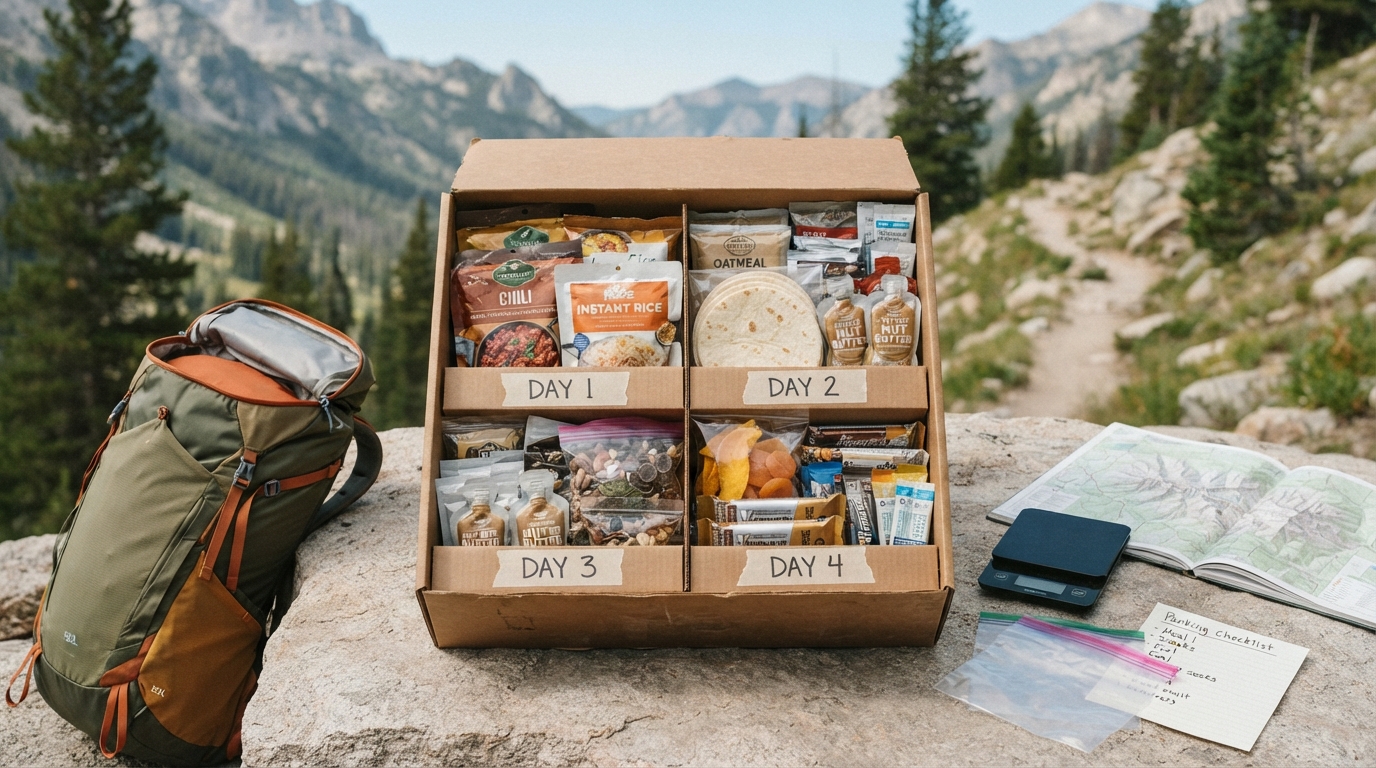
📦 Make Portions Before You Leave
Don’t just write:
“Trail mix — 1 bag.”
Write:
“Trail mix — 2 oz portion.”
Then prepare the portions at home.
For example:
Day 1 snack: 2 oz
Day 2 snack: 2 oz
Day 3 snack: 2 oz
Day 4 snack: 2 oz
This makes your meal plan much more accurate.
It also helps prevent the classic trail problem of eating too many snacks early in the trip and discovering that the remaining food has to stretch farther than planned. 😅
🏷️ Label Everything
Once your portions are prepared, label them.
A simple system could look like:
DAY 1 — BREAKFAST
DAY 1 — LUNCH
DAY 1 — SNACKS
DAY 1 — DINNER
Then repeat for Days 2, 3, and 4.
This is especially useful when you’re tired at camp.
Instead of opening six different bags and trying to remember what belongs to which meal, you can simply follow the printed plan.
💧 Add Water Requirements
Calories and weight aren’t the only numbers worth tracking.
Add a column for required water.
For example:
| Meal | Calories | Weight | Water |
|---|---|---|---|
| Oatmeal | 600 | 6 oz | 0.5 L |
| Trail mix | 300 | 2 oz | 0 L |
| Tortilla lunch | 500 | 4 oz | 0 L |
| Dehydrated dinner | 700 | 5 oz | 0.5 L |
The actual amount depends on the specific food and package instructions.
This information is also useful for stove-fuel planning. REI recommends considering cooking time and required boiling water when determining how much fuel you’ll need.
A meal that requires simmering can have very different fuel requirements from one that only needs a short soak in hot water.
🔥 Add Cooking Time
A printable plan can also tell you how complicated each meal is.
Add:
Cook: 5 minutes
Soak: 10 minutes
No cook: Yes
This gives you an immediate picture of your daily workload.
For a high-mileage day, you might intentionally choose:
Breakfast: quick
Lunch: no-cook
Dinner: just-add-water
For an easier day, you might choose a meal that requires more preparation.
That turns your meal plan into more than a calorie chart.
It becomes a daily energy-management plan.
🧮 Create a Daily Summary
At the bottom of each day, include:
Day 1
Calories: ______
Food weight: ______
Calories/oz: ______
Water required: ______
Cooking time: ______
Repeat for every day.
This makes it extremely easy to spot an imbalance.
Maybe Day 1 has 3,500 calories while Day 4 only has 2,100.
Maybe one day contains much more food weight than the others.
The printable sheet makes these differences obvious before you leave home.
🎒 Create a Trip Summary
After completing every day, add one final section.
Total Trip
Total calories: ______
Total food weight: ______
Average calories/day: ______
Average food weight/day: ______
Total water required for cooking: ______
Total meals: ______
Total snacks: ______
This is the number you can use when preparing your backpack.
For example:
12,800 calories
5.2 lb food
4 breakfasts
4 lunches
4 dinners
16 snack portions
Now you have a concrete packing target instead of a vague pile of food.
🧾 Don’t Forget Packaging Weight
There’s an important detail that many food spreadsheets miss.
Food weight isn’t always the same as the weight you carry.
You may also have:
- Bags
- Wrappers
- Pouches
- Boxes
- Labels
- Condiment packets
- Drink containers
If you’re seriously optimizing pack weight, weigh the finished packed portions, not just the food before packaging.
You can then calculate:
Total packed food weight = food + packaging
This gives you a more realistic number.
♻️ Track Your Trash
For longer trips, packaging volume can matter almost as much as weight.
Your printable plan can include:
Packaging: ______
Trash after eating: ______
This becomes especially useful where all food packaging must be packed out.
It also encourages you to remove unnecessary outer packaging before leaving home.
🥾 Add an Emergency-Food Line
Don’t make your printable plan so precise that there’s no flexibility.
A small contingency can be useful for unexpected delays or changes in your itinerary.
You might list:
Emergency snack: __________
Calories: __________
Weight: __________
This does not mean bringing an enormous extra food supply.
It simply gives you a visible reminder that your trip may not follow the original schedule perfectly.
REI similarly recommends carrying some extra food while cautioning against routinely overpacking.
🖨️ Make the Printable Version Easy to Use
Your final page doesn’t need fancy graphics.
A clean layout works better.
PAGE 1 — TRIP OVERVIEW
- Trip dates
- Number of days
- Number of hikers
- Daily calorie target
- Total calorie target
- Cooking system
- Food-storage requirements
PAGE 2 — DAILY MEAL PLAN
- Breakfast
- Lunch
- Dinner
- Snacks
- Calories
- Weight
- Water
- Cooking time
PAGE 3 — PACKING CHECKLIST
☐ Breakfasts
☐ Lunches
☐ Dinners
☐ Snacks
☐ Drinks
☐ Seasonings
☐ Emergency food
☐ Cooking ingredients
☐ Food-storage supplies
☐ Trash bags
📋 Copy-and-Print Backpacking Meal Planner
You can use this basic template for each day:
DAY: ______
🌅 Breakfast
Food: ____________________
Portion: __________________
Calories: _________________
Weight: __________________
Water: ___________________
Cook time: ________________
🥪 Lunch
Food: ____________________
Portion: __________________
Calories: _________________
Weight: __________________
Water: ___________________
Cook time: ________________
🥜 Snacks
Food: ____________________
Portion: __________________
Calories: _________________
Weight: __________________
🍜 Dinner
Food: ____________________
Portion: __________________
Calories: _________________
Weight: __________________
Water: ___________________
Cook time: ________________
📊 Daily Total
Calories: __________
Weight: __________
Calories/oz: __________
Water for cooking: __________
💡 Make the Plan Better After Every Trip
One of the biggest advantages of keeping a printable meal plan is that you can improve it after hiking.
When you return, mark each item:
❤️ Loved it
👍 Worked well
😐 Would eat again
❌ Never again
Also record:
- Food you didn’t finish
- Food you wanted more of
- Snacks you got tired of
- Meals that took too long
- Foods that became damaged
- Portions that were too large
- Portions that weren’t enough
Your next meal plan can then be based on your own trail experience, rather than someone else’s perfect-looking menu.
🌲 Final Thoughts
A printable backpacking meal plan is more than a shopping list.
It is a simple way to connect calories, portions, weight, cooking requirements, and packing before you ever reach the trailhead.
Start with your personal energy needs. Build the menu around foods you actually enjoy. Weigh the portions, calculate the calories, track cooking water, and organize everything by day.
Then print the final version and use it as your packing checklist. 🎒
The goal isn’t to create the most complicated spreadsheet.
It’s to reach the trailhead knowing:
I know what I’m eating.
I know how much it weighs.
I know how many calories I’m carrying.
And I know exactly what goes into my backpack. 🥾🌲