How to Build a Gluten-Free 3-Day Backpacking Meal Plan 🥾🌾
Introduction
A three-day backpacking trip is long enough to make food planning important, but short enough that you can build a complete menu without carrying an enormous food bag.
For a gluten-free trip, however, meal planning involves one additional step. You cannot simply choose foods that seem naturally gluten-free. You need to check packaged ingredients, seasonings, sauces, oats, snacks, and anything that could introduce gluten through cross-contact.
The good news is that a gluten-free backpacking menu doesn’t have to be complicated.
With a simple structure, you can prepare three breakfasts, three lunches, three dinners, and trail snacks using lightweight foods that are easy to pack and prepare.
The goal is to create food that is:
- 🌾 Gluten-free based on verified ingredients and labeling
- 🎒 Lightweight and compact
- 🔥 Easy to prepare
- 💪 Satisfying after hiking
- 🥜 Balanced with carbohydrates, protein, and fats
- 🧼 Practical for avoiding cross-contact
Let’s build the menu step by step.
🥾 Step 1: Start With Your Trip Conditions
Before choosing food, write down the basic details of your trip.
Consider:
- Number of hiking days
- Distance per day
- Elevation gain
- Expected temperatures
- Water availability
- Cooking equipment
- Fuel availability
- Whether you’re hiking alone or with a group
- Whether refrigeration will be available
For this example, we’ll assume:
3 days
2 nights
No refrigeration
One lightweight stove
Hot-water cooking
This is a planning example, not a universal nutritional prescription.
Your individual energy and protein needs can be different.
🌾 Step 2: Build the Menu Around Gluten-Free Staples
Start with ingredients that are naturally gluten-free or specifically labeled gluten-free.
Useful backpacking staples include:
Carbohydrates
- Rice
- Instant rice
- Gluten-free oats
- Quinoa
- Gluten-free pasta
- Rice noodles
- Corn tortillas
- Instant potatoes
- Gluten-free crackers
Protein
- Dehydrated lentils
- Dehydrated beans
- Certified gluten-free or appropriately labeled protein products
- Nuts
- Seeds
- Peanut butter
- Nut butter
- Some shelf-stable protein foods
Flavor
- Olive oil
- Nutritional yeast
- Garlic powder
- Onion powder
- Chili flakes
- Curry powder
- Dried herbs
- Gluten-free tamari
- Verified gluten-free seasoning blends
Always check the actual product label because formulations vary.
🔎 Step 3: Verify Every Packaged Ingredient
This is one of the most important parts of the plan.
A food doesn’t become gluten-free simply because its main ingredient is naturally gluten-free.
For example:
Plain rice is naturally gluten-free.
But a flavored rice packet may contain a seasoning blend or sauce containing wheat or another gluten-containing ingredient.
The same principle applies to:
- Instant potatoes
- Protein bars
- Granola
- Trail mix
- Seasoning packets
- Soup mixes
- Rice noodles
- Dehydrated meals
- Snack foods
Look at the current package, including the ingredient list and relevant allergen information.
When a product is specifically labeled gluten-free, that provides useful verification. In the United States, FDA-regulated foods using a “gluten-free” claim must meet the FDA’s definition, including a limit of less than 20 parts per million of gluten.
If you are avoiding gluten because of celiac disease or another medical condition, follow the standards appropriate to your situation and location.
🌅 DAY 1: Easy Start
Breakfast: Peanut Butter Banana Oatmeal 🥜🍌
Pack:
- Gluten-free instant oats
- Peanut butter
- Chia seeds
- Dried banana
- Cinnamon
- Optional gluten-free protein powder
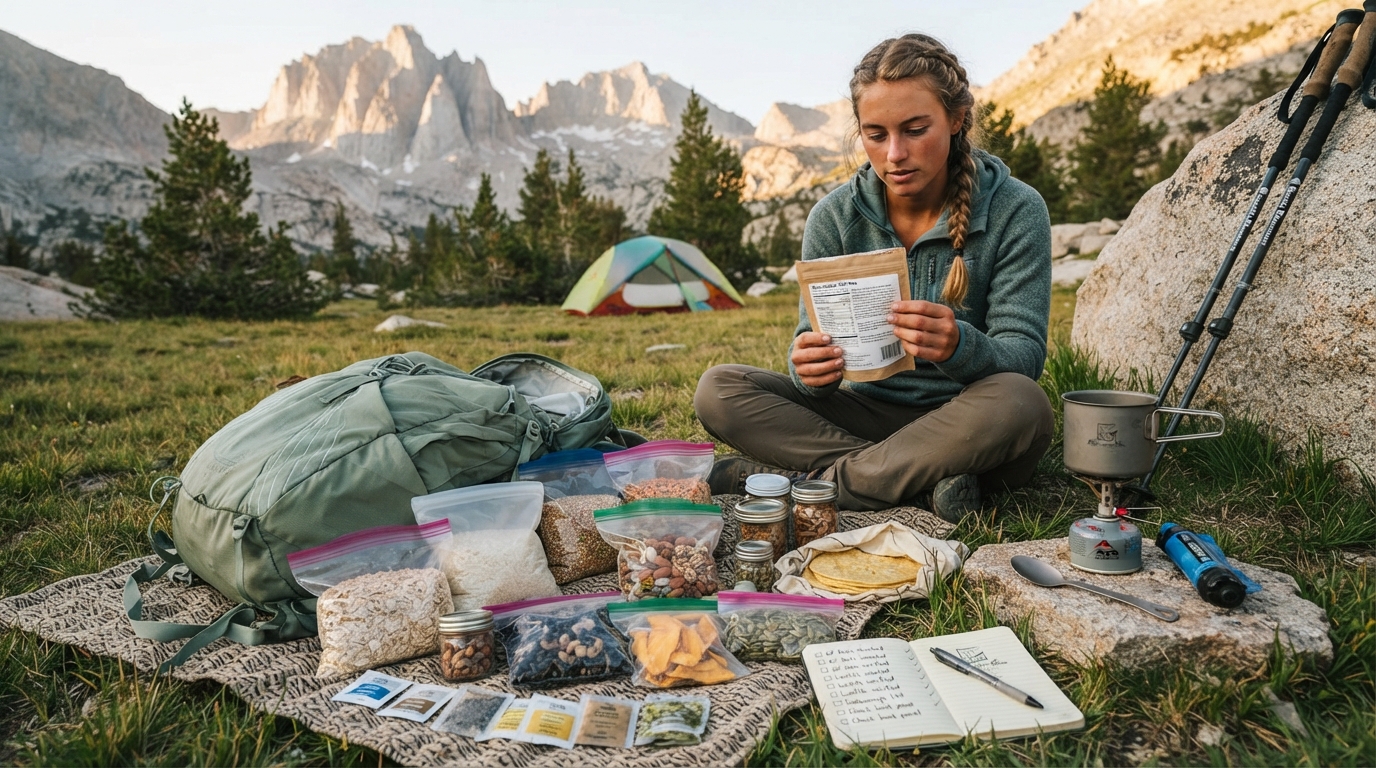
Combine the dry ingredients in a labeled bag at home.
At camp, add hot water and stir.
This gives you a warm breakfast with carbohydrates, fat, and protein without requiring much cooking.
Trail Snack
Pack a small portion of:
- Nuts
- Dried fruit
A combination is more interesting than eating one ingredient repeatedly throughout the day.
Lunch: Bean and Corn Tortilla Wrap 🌽
Pack:
- Corn tortillas
- Gluten-free dehydrated refried beans or bean flakes
- Dehydrated vegetables
- Nutritional yeast
- Verified gluten-free seasoning
- Hot sauce if verified gluten-free
Rehydrate the beans with hot water.
Spread them onto the tortillas and add the vegetables and seasonings.
If you’re carrying fresh tortillas, protect them from crushing by placing them near the top of your pack.
Afternoon Snack
Try:
- Gluten-free snack bar
- Nuts or seeds
Check the snack bar carefully rather than assuming that a “protein bar” or “energy bar” is gluten-free.
Dinner: Lentil Curry Rice 🍛
Pack:
- Instant rice
- Dehydrated lentils
- Dehydrated vegetables
- Coconut milk powder
- Verified gluten-free curry powder
- Garlic powder
- Olive oil
Rehydrate the lentils and vegetables according to the product instructions.
Prepare the rice.
Combine everything and add olive oil near the end.
The result is a warm, filling dinner with very little cleanup.
🌄 DAY 2: Keep the Menu Interesting
One of the easiest ways to get tired of backpacking food is to eat the same flavor every day.
The ingredients don’t need to be completely different.
Change the seasonings instead.
Breakfast: Apple Cinnamon Oats 🍎
Pack:
- Gluten-free oats
- Peanut butter powder or peanut butter
- Dried apples
- Chia seeds
- Cinnamon
- Optional maple sugar
Add hot water and allow the oats to soften.
The combination feels completely different from the banana version even though the basic ingredients are similar.
Morning Snack
Pack:
- Trail mix
- Dried fruit
Make sure the trail mix is verified gluten-free if strict avoidance is required.
Don’t assume that a flavored commercial trail mix is safe simply because its main ingredients are nuts and fruit.
🥔 Lunch: Loaded Potato Bowl
Instant mashed potatoes can make an excellent backpacking base.
Choose a verified gluten-free product.
Add:
- Dehydrated lentils
- Dehydrated peas
- Nutritional yeast
- Garlic powder
- Olive oil
- Gluten-free seasoning
Add hot water and stir.
The result is a warm lunch that requires minimal cooking.
Afternoon Snack
Try:
- Peanut butter packet
- Gluten-free crackers
- Dried fruit
Individual packets can also help reduce the chance of cross-contact from shared jars.
🍜 Dinner: Peanut Rice Noodles
Pack:
- Rice noodles
- Peanut butter
- Gluten-free tamari
- Dehydrated vegetables
- Chili flakes
- Optional sesame seeds
Check the rice noodles and every sauce or seasoning individually.
Rice noodles aren’t automatically safe just because they are made primarily from rice.
Some flavored products can contain additional ingredients.
Prepare according to the package or your tested trail method.
🌲 DAY 3: Keep Preparation Simple
By the third morning, you’re likely more interested in getting packed and moving than cooking an elaborate breakfast.
Breakfast: Chocolate Peanut Oats 🍫
Pack:
- Gluten-free oats
- Cocoa powder
- Peanut butter
- Chia seeds
- Dried banana
- Cinnamon
Add hot water and stir.
If you use cocoa powder or flavored protein products, check their labels rather than assuming every brand has the same ingredients.
Morning Snack
Use another simple combination:
- Nuts
- Dried fruit
- Gluten-free energy bar
This helps use up the remaining food without creating another complicated meal.
🌯 Lunch: Dehydrated Bean Wrap
Use:
- Corn tortillas
- Dehydrated beans
- Dehydrated vegetables
- Nutritional yeast
- Verified gluten-free taco seasoning
Rehydrate the beans and vegetables.
Add them to the tortillas.
If you want extra energy, add a small packet of olive oil or another suitable fat.
🍚 Dinner: Simple Rice and Bean Bowl
If you’re eating dinner on the final night, keep it straightforward.
Pack:
- Instant rice
- Dehydrated black beans
- Dehydrated vegetables
- Olive oil
- Cumin
- Garlic powder
- Chili
- Verified gluten-free seasoning
Add hot water to the ingredients that require rehydration.
Prepare the rice according to your chosen product.
Combine everything and season to taste.
It’s simple, but that’s often exactly what you want after three days on the trail.
📋 Your Complete 3-Day Menu
| Day | Breakfast | Lunch | Dinner |
|---|---|---|---|
| Day 1 | Peanut banana oats | Bean corn-tortilla wrap | Lentil curry rice |
| Day 2 | Apple cinnamon oats | Loaded potato bowl | Peanut rice noodles |
| Day 3 | Chocolate peanut oats | Dehydrated bean wrap | Rice and bean bowl |
Snacks
Rotate:
- Nuts
- Seeds
- Dried fruit
- Gluten-free snack bars
- Peanut butter
- Gluten-free crackers
- Roasted chickpeas
🧮 Step 4: Calculate Calories
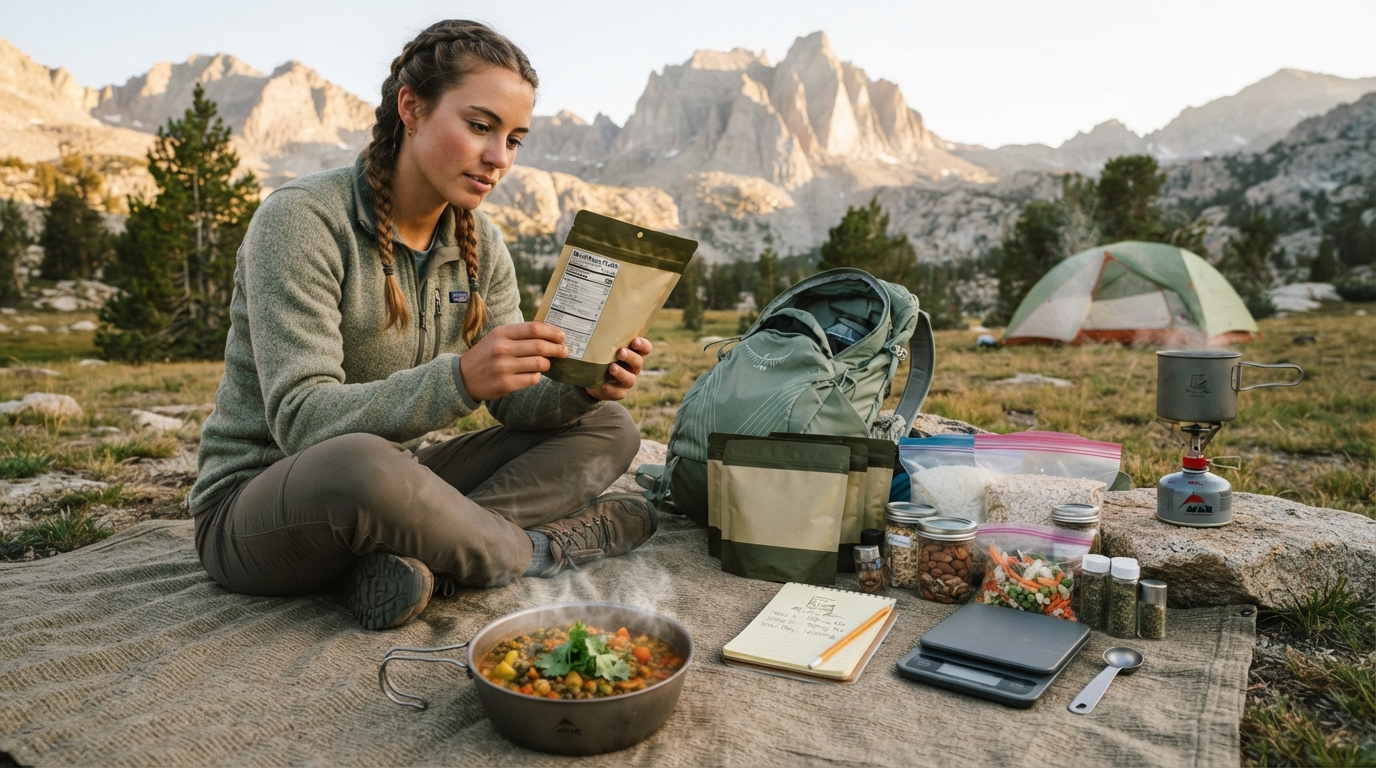
Once the menu is chosen, use the nutrition labels to calculate calories.
For example, suppose breakfast contains:
- Oats = 300 kcal
- Peanut butter = 190 kcal
- Chia seeds = 60 kcal
- Dried fruit = 100 kcal
Total:
300 + 190 + 60 + 100 = 650 calories
Do the same for every meal and snack.
Don’t copy calorie numbers from another person’s recipe unless the ingredients and quantities are identical.
Brands and serving sizes vary.
💪 Step 5: Calculate Protein
Use the same method for protein.
If your breakfast provides:
- Oats = 10 g
- Peanut butter = 7 g
- Chia = 2 g
- Dried fruit = 1 g
Then:
10 + 7 + 2 + 1 = 20 g protein
Repeat this calculation throughout the day.
Your individual protein needs depend on factors such as body size, activity, age, and overall diet.
The goal is to build a menu appropriate for you, rather than copying a universal protein target.
⚖️ Step 6: Calculate Food Weight
Backpacking food needs to fit inside your pack.
Weigh ingredients before leaving.
For example:
| Category | Example Weight |
|---|---|
| Breakfasts | 450 g |
| Lunches | 600 g |
| Dinners | 750 g |
| Snacks | 600 g |
| Seasonings and extras | 150 g |
| Example total | 2,550 g |
These are only planning numbers.
Your actual weight will depend on your quantities and products.
Remember to include things that are easy to forget, such as:
- Cooking oil
- Drink mixes
- Sauces
- Seasonings
- Protein powders
- Condiments
🎒 Step 7: Package Each Meal Separately
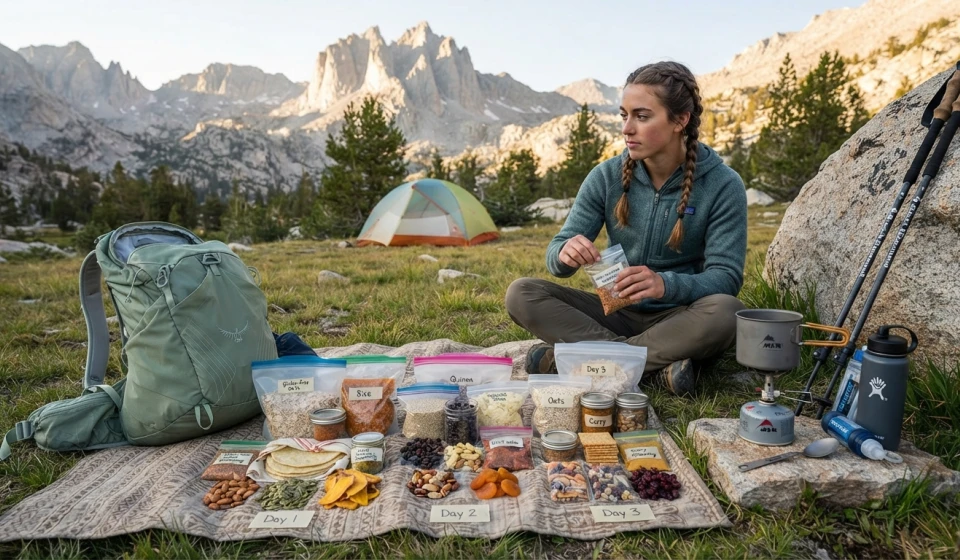
Instead of carrying one giant food bag, organize meals individually.
Label them:
DAY 1 BREAKFAST
DAY 1 LUNCH
DAY 1 DINNER
Continue through Day 3.
Write preparation instructions directly on each bag.
For example:
Add 300 mL hot water
Wait 5 minutes
Stir
This saves time and prevents the classic trail problem of staring into a bag of ingredients and wondering what you intended to make. 😄
🧼 Step 8: Prevent Cross-Contact
If gluten avoidance is medically necessary, meal planning doesn’t stop at the ingredient list.
Think about how food is prepared.
Use clean:
- Pots
- Utensils
- Cutting surfaces
- Storage containers
Be especially careful when sharing a campsite with people who eat gluten-containing foods.
Shared spreads can also create problems.
For example, a jar of peanut butter can become contaminated if someone uses a knife that previously touched wheat bread.
Individual packets can simplify this issue.
🚰 Step 9: Check Water Requirements
Dry backpacking foods need water.
Before committing to a meal, determine:
How much water does it require?
Do I have reliable water access?
Does it require boiling?
How much fuel will it use?
A meal can look extremely lightweight until you realize that it requires a large amount of cooking water.
Testing meals at home helps you determine realistic water requirements.
🧪 Step 10: Test Your Complete Menu
Don’t wait until the trail to discover that your dinner is terrible.
Make at least one complete day of the menu at home.
Check:
- Taste
- Texture
- Portion size
- Water requirement
- Cooking time
- Cleanup
- Packaging
- Energy and protein totals
If you’re using dehydrated foods, make sure they rehydrate properly.
A meal that works perfectly in theory may need more water, less water, or a different preparation method.
🚨 Be Extra Careful With “Naturally Gluten-Free” Foods
A common mistake is assuming that a naturally gluten-free ingredient automatically makes a packaged product gluten-free.
Examples:
Rice → flavored rice meal
Potatoes → seasoned instant potatoes
Corn → flavored corn snack
Oats → regular oatmeal
Nuts → seasoned trail mix
The base ingredient may be gluten-free.
The finished product may not be.
That’s why your three-day menu should be built around verified products, not assumptions.
🎒 A Simple Packing System
For a clean three-day system, organize your food into three categories.
Bag 1: Meals
Nine individual meal bags.
Bag 2: Snacks
Separate daily snack portions.
Bag 3: Flavor and Extras
Keep together:
- Oil
- Seasonings
- Hot sauce
- Drink mixes
- Other small additions
This makes your food bag easier to organize and helps prevent accidentally forgetting a crucial ingredient.
🌿 Final Thoughts
Building a gluten-free three-day backpacking meal plan doesn’t have to mean carrying specialty foods or spending hours creating complicated recipes.
Start with reliable staples such as rice, gluten-free oats, potatoes, beans, lentils, nuts, seeds, dried fruit, corn tortillas, and verified gluten-free packaged foods.
Then create three simple meals each day and add snacks around them.
The most important step is verification. Check the current label, ingredients, allergen information, and gluten-free claims for packaged foods. Pay special attention to sauces, seasonings, oats, instant meals, and snacks.
Finally, weigh everything, calculate your actual calories and protein from the labels, test the meals at home, and plan your cooking routine before you reach the trail. 🥾🌾
A good three-day backpacking menu should feel almost boring in its organization.
You should know what you’re eating, how much you’re carrying, how to prepare it, and why you’ve chosen each ingredient.
That preparation leaves you free to focus on the part that actually matters: enjoying the trail. 🌲✨