🎒 How to Pack Food for a Backpacking Trip Without Stuffing Everything Into Your Pack
Backpacking food has a funny way of taking over your pack.
You start with a reasonable menu. Then you add snacks. Then an extra dinner “just in case.” Then the bulky packaging. Then a few cans because they seem convenient.
Suddenly, your food bag looks like you’re moving into the wilderness permanently. 😅
The solution isn’t simply to squeeze everything harder.
Good backpacking food packing starts before you put anything into the backpack.
By choosing calorie-dense foods, removing unnecessary packaging, organizing meals by day, and separating food from the equipment you actually need, you can make your food load significantly easier to carry.
Here’s how to build a food system that fits your trip instead of letting the food dictate the size of your pack.
🗺️ Start With the Trip, Not the Food
Before choosing meals, establish the basic conditions of the trip.
Ask:
- How many days are you hiking?
- Will you resupply?
- How many people are eating?
- Are you cooking or going no-cook?
- What temperatures should you expect?
- How much water will be available?
- Do you have dietary restrictions?
- Are there food-storage requirements?
- How many calories will you realistically need?
A one-night trip and a seven-day trip should not be packed using exactly the same system.
For example, a short trip may tolerate a few bulky comfort foods.
A longer trip makes food volume and packaging much more important.
⚖️ Think in Calories Per Ounce, Not Just Calories
One of the most useful concepts in backpacking meal planning is energy density.
Foods with more calories per unit of weight can provide more energy without requiring as much food weight.
Fats are particularly energy-dense, while many fresh fruits and vegetables contain substantial water and therefore weigh more for the calories they provide.
This doesn’t mean you should eat nothing but fat.
It means that when pack weight matters, compare foods based on calories per ounce or per gram, not just calories per serving.
A simple calculation is:
Calories per ounce = total calories ÷ total food weight in ounces
For example, if a food provides 600 calories and weighs 5 ounces:
600 ÷ 5 = 120 calories per ounce
This gives you a useful way to compare different ingredients.
📦 Remove the Packaging Before You Leave
One of the easiest ways to reduce bulk is to stop carrying packaging you don’t need.
Many foods come in:
- Cardboard boxes
- Large plastic bags
- Individual wrappers
- Excess air-filled packaging
- Multiple layers of packaging
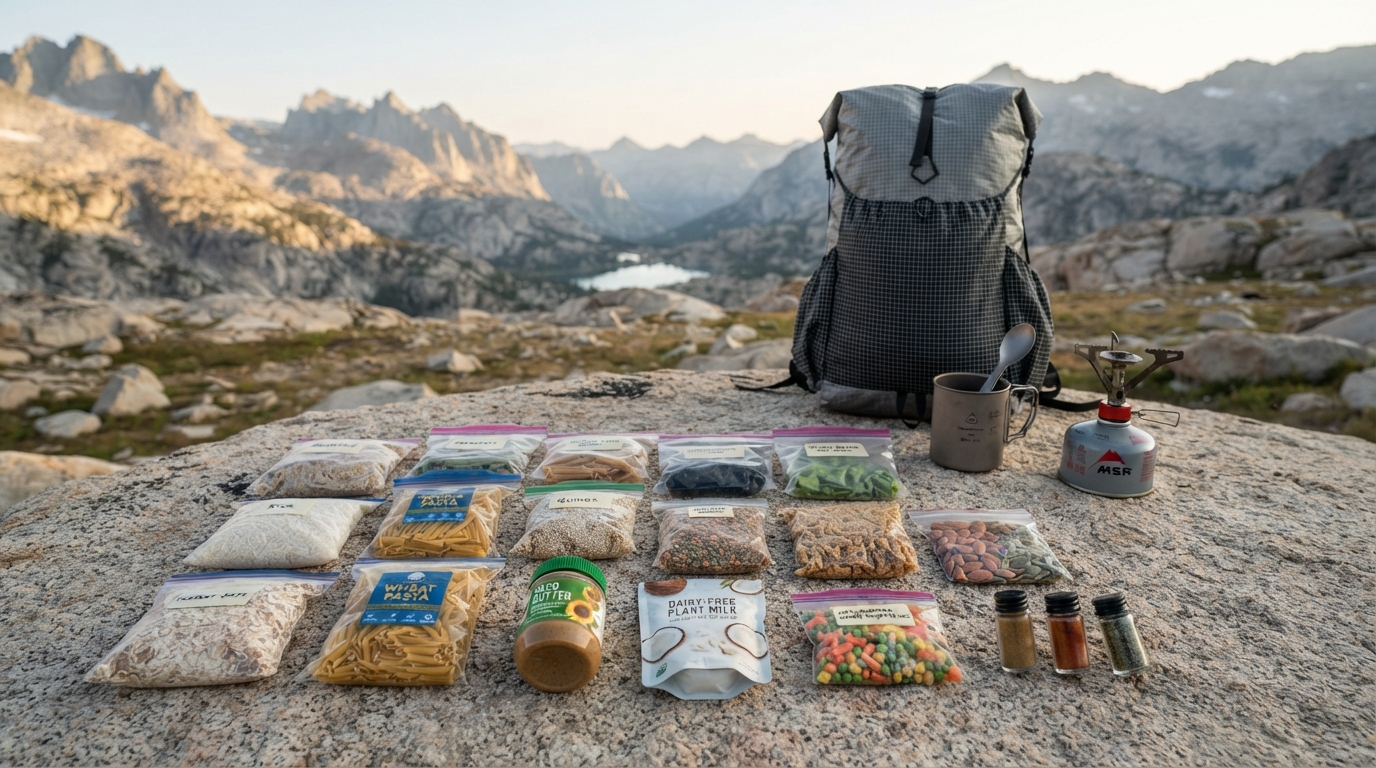
If the original package isn’t needed for food safety or preparation instructions, consider repacking the food into a suitable lightweight container.
For example:
Box of instant noodles → labeled resealable bag
Large oatmeal carton → individual portions
Bulk trail mix → daily portions
Freeze-dried meal pouch → keep original pouch if it is designed for cooking
However, don’t remove information you may genuinely need.
Keep important preparation instructions, allergen information, expiration information, and other necessary details accessible.
A small permanent marker can turn a plain bag into a useful meal label.
🏷️ Label Everything
A mystery bag might seem funny at home.
It becomes considerably less funny after a long day of hiking. 😂
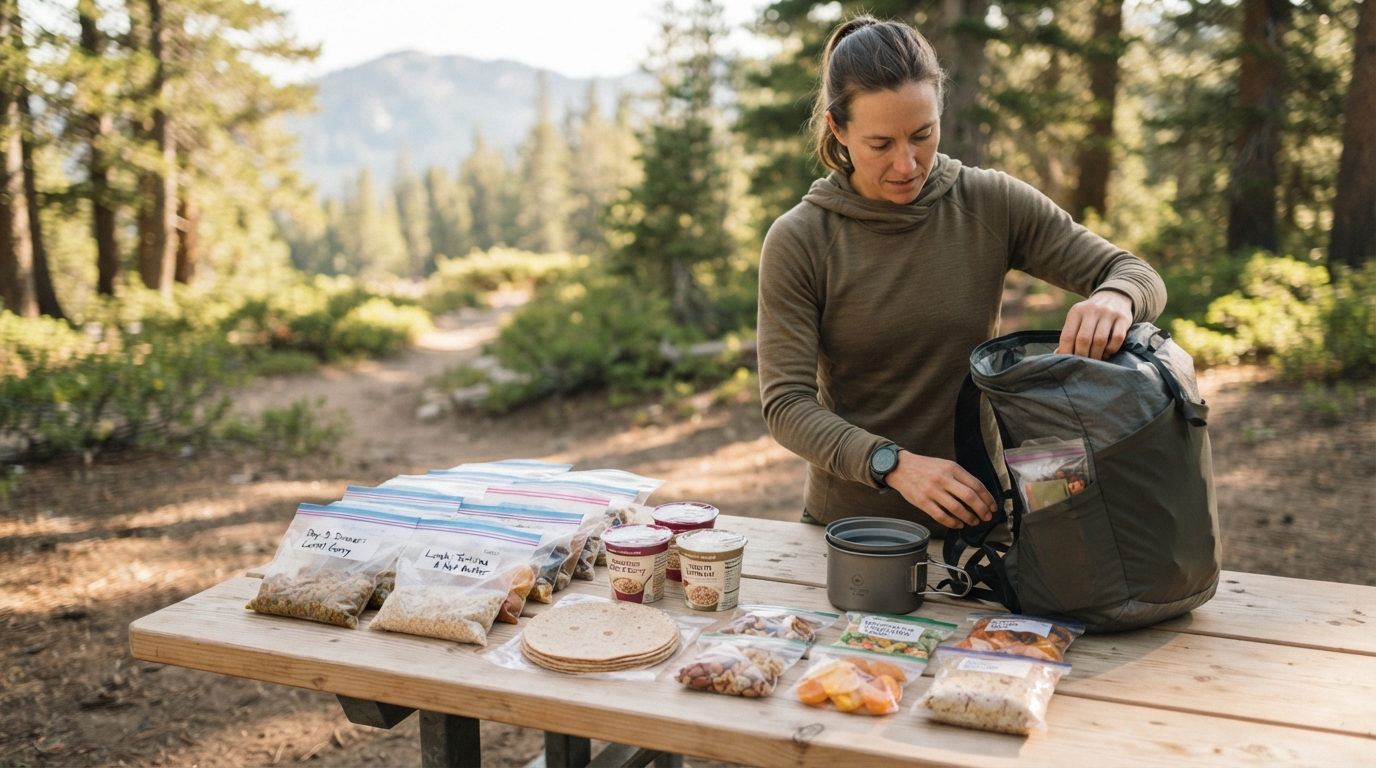
Label repacked food with:
Day + Meal + Preparation
For example:
DAY 3 — DINNER
Couscous + chicken + seasoning
Add 1¼ cups boiling water
Rest 5 minutes
You can also mark snacks by day:
DAY 2 — TRAIL SNACKS
This makes food management much easier.
You don’t have to open every bag to figure out what it contains.
🍜 Pack Meals by Day
Instead of carrying one enormous collection of loose food, create daily meal groups.
For example:
DAY 1
Breakfast
Oatmeal + milk powder + nuts
Lunch
Tortilla + peanut butter + dried fruit
Dinner
Couscous + dehydrated vegetables + protein
Snacks
Trail mix + bar
Then repeat for the following days.
This creates a simple system:
One day = one food bundle.
You can place each day’s meals into a larger bag or organize them inside your food storage system.
It also makes resupply easier because you can quickly determine how many complete days of food remain.
🥣 Choose Foods That Stack Well
Some foods are nutritionally useful but awkward to pack.
Others fit together almost perfectly.
For example:
- Instant oatmeal
- Couscous
- Instant rice
- Powdered drink mixes
- Dehydrated vegetables
- Nut butter
- Tortillas
- Dried fruit
- Nuts
- Seeds
These foods can often be compressed, portioned, or packed together efficiently.
Think of your food bag like a puzzle.
Instead of asking:
“What foods do I like?”
also ask:
“How efficiently does this food use the space available?”
🥜 Use Dense Foods for the Space You Have
Backpacking menus often benefit from compact foods such as:
- Nuts
- Nut butters
- Seeds
- Dried fruit
- Chocolate
- Granola
- Crackers
- Tortillas
- Instant grains
- Dehydrated meals
The right combination depends on your dietary preferences and tolerance.
A useful strategy is to combine different textures and food types so that you don’t end up eating the same dense snack repeatedly.
For example:
Nut butter + tortilla + dried fruit
takes relatively little space while providing a combination of carbohydrate, fat, and some protein.
🧂 Watch the “Tiny Extras”
Small items have a habit of multiplying.
A backpacking meal might start with:
- Main food
- Seasoning
- Sauce
- Oil
- Cheese
- Garnish
- Snack
- Drink mix
Individually, each seems insignificant.
Together, they become another food bag.
Choose your extras intentionally.
A small amount of olive oil, powdered seasoning, hot sauce, or dried cheese can make a simple meal much more enjoyable.
But you don’t need five different flavor packets for every dinner.
🫗 Don’t Carry Water You Don’t Need
Water is heavy.
That’s one reason dehydrated and freeze-dried foods are so common in backpacking.
Removing water from food can dramatically reduce its carried weight, while the water can be added later when you prepare the meal.
This is particularly useful for:
- Dehydrated vegetables
- Instant grains
- Dried fruit
- Powdered beverages
- Freeze-dried meals
However, remember that dehydrated food still requires water at the campsite.
Your route and water availability therefore matter when choosing how much dehydrated food makes sense.
🥫 Be Selective With Cans and Jars
Canned foods can be convenient at home.
In a backpack, their weight includes both the food and the container.
The same applies to glass jars.
For trips where pack weight is important, consider whether a shelf-stable dehydrated, freeze-dried, powdered, or otherwise lightweight alternative can provide a similar meal function.
This doesn’t mean canned food is forbidden.
For a short trip, you may decide the comfort is worth the weight.
Backpacking is ultimately a balance between weight, nutrition, convenience, and enjoyment.
🥤 Don’t Forget Drinks
Drink mixes can add flavor and calories, but they also create additional packaging.
Instead of bringing a large container, portion only what you need.
For example:
Day 1 — electrolyte mix
Day 2 — electrolyte mix
Day 3 — electrolyte mix
Keep the portions clearly labeled.
If you’re carrying powdered drinks, remember that the powder itself still contributes to total food weight.
🗑️ Plan for Your Trash
One overlooked part of food packing is what happens after you eat.
Every wrapper, pouch, bag, and container you bring into the backcountry may need to come back out.
A good food system considers both:
Packed weight → eaten food → remaining packaging
This is another reason reducing unnecessary packaging can help.
It can also make your food bag easier to manage during the trip.
Follow the regulations and Leave No Trace practices that apply to your destination.
🐻 Keep Food Storage Separate From Meal Organization
Food organization and food storage are two different problems.
You might organize meals by day, but your campsite may require a bear-resistant container, bear canister, food locker, hanging system, or another approved storage method.
Follow local regulations and land-manager requirements.
Don’t choose a food-packing method that conflicts with the food-storage rules for your route.
For trips in bear country, the required storage system may affect the shape and amount of food you can carry.
Plan around that constraint from the beginning.
🎒 Pack the Food Bag Last
Once you’ve planned the menu and reduced unnecessary packaging, weigh the entire food load.
Then ask:
Can anything be removed without reducing the trip’s safety or nutrition?
Look for:
- Duplicate snacks
- Excessive “just in case” food
- Bulky packaging
- Foods you don’t actually enjoy
- Ingredients that appear in only one meal
- Heavy containers
- Excess water
- Unnecessary beverages
Don’t remove food simply to hit an arbitrary weight target.
The goal is an efficient food system, not underfeeding yourself.
🔢 Use a Simple Food-Weight Calculation
If you’re planning a longer trip, estimate your total food weight before buying everything.
For example:
Daily food weight × number of hiking days = approximate total food weight
If your plan averages 1.5 pounds per day:
1.5 lb × 5 days = 7.5 lb
Then add any food for contingencies that you have deliberately planned.
You can also track calories:
Daily calories × number of days = total planned calories
This gives you a clearer picture before you discover that your food bag is much heavier than expected.
🧪 Test the Menu Before the Trip
Don’t make your first experiment on day four of a remote backpacking trip.
Try the meals at home.
Ask:
- Do I actually like this?
- Is the portion sufficient?
- Does it require too much water?
- Does it take too long to prepare?
- Does the packaging work?
- Is the food too salty or sweet?
- Does it survive being packed?
- Will I still want to eat it after hiking all day?
A meal that looks efficient on paper may be completely unappealing after several hours on the trail.
Pack food you will actually eat.
✨ The “Pack Less Without Eating Less” Strategy
If your backpack feels overloaded with food, don’t immediately cut calories.
First try these steps:
1. Remove unnecessary packaging
📦 Less bulk.
2. Choose more energy-dense foods
⚖️ More calories for the weight.
3. Dehydrate where appropriate
💧 Less carried water.
4. Portion meals
🗂️ Less disorganization.
5. Combine ingredients
🥣 Fewer separate packages.
6. Test everything
😋 Less wasted food.
7. Recheck your numbers
📊 Know what you’re actually carrying.
This is usually more useful than simply cramming the same food into a smaller bag.
🌲 Final Thoughts
Packing backpacking food efficiently isn’t about forcing an enormous amount of food into a tiny stuff sack.
It’s about designing the menu before you pack it.
Choose foods with an appropriate balance of calories, weight, nutrition, and taste. Remove unnecessary packaging. Portion meals. Label everything. Consider water weight. Plan for trash. Follow local food-storage requirements.
Then weigh the finished system before you leave.
The best backpacking food bag isn’t necessarily the smallest one.
It’s the one that gives you the food you need, in a format you will actually eat, without carrying unnecessary weight and clutter for miles. 🎒🌲