Homemade Trail Food Pouches: How to Pack Potatoes, Applesauce, and Other Real Foods
Commercial gels are convenient on the trail, but they are not the only way to carry food in a format that can be opened quickly and eaten with minimal fuss. 🥔 Homemade trail food pouches let hikers experiment with familiar foods such as applesauce, smooth potato purée, and other soft foods while controlling portion size, flavor, ingredients, and packaging. The important catch is that changing the container does not change the food’s storage requirements, so good pouch design must include food safety as well as convenience.
This makes homemade trail food pouches less of a “DIY energy gel” project and more of a practical Fueling Strategy and Pack-out Design experiment. A pouch can make certain foods easier to portion, squeeze, store, and eat during a rest stop, but the best container depends on what is inside, how long it will be carried, and whether refrigeration is required. 🎒 Understanding those differences helps hikers decide when reusable pouches are useful and when a dry snack or factory-sealed product is the smarter option.
Why Some Trail Foods Are Easier To Carry In Pouches
Soft foods create packaging problems that crackers, bars, nuts, and tortillas rarely have because they cannot simply be dropped into a lightweight bag and expected to remain convenient. Mashed foods can leak, stick to containers, require a spoon, or spread over the inside of a bag if the closure fails. A squeeze pouch solves part of that problem by turning a spoonable food into something that can be eaten directly through a small opening.
Accessibility can also matter when your hands are cold, wet, dirty, or occupied with trekking poles and other equipment. 🥾 A pouch with a large, easy-to-grip cap may be simpler during a rest break than opening a container and using a utensil, although designs vary considerably. This does not make pouches universally superior—it simply shows why food format can be as important as the food itself when planning trail meals.
Which Real Foods Work In Reusable Squeeze Pouches?
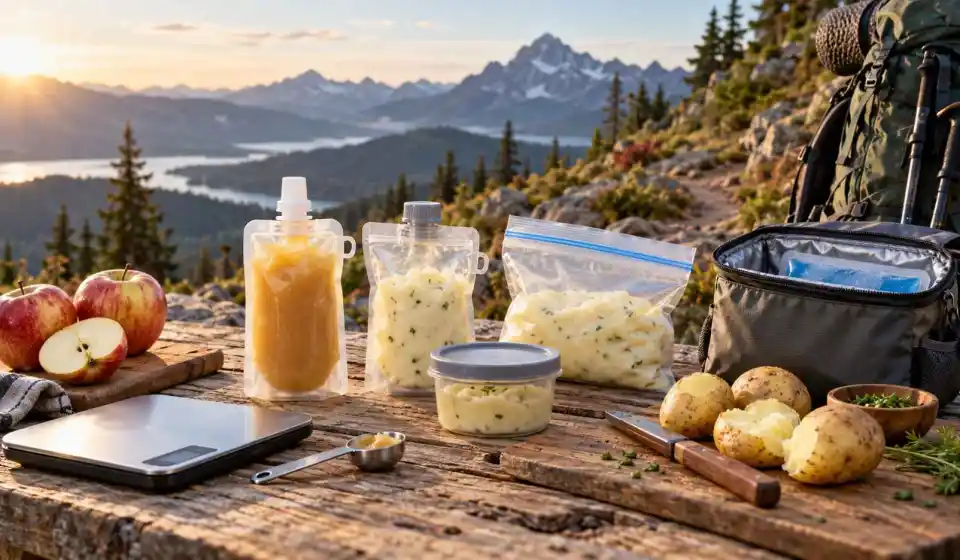
Smooth applesauce is one obvious candidate because its consistency already resembles foods commonly sold in commercial squeeze packaging. Homemade or opened applesauce transferred into a reusable pouch should still be handled according to its actual storage requirements, however, rather than assuming the pouch makes it shelf-stable. 🍎 For longer unrefrigerated trips, a manufacturer-sealed product specifically labeled for shelf-stable storage before opening is a fundamentally different option from a pouch filled at home.
Smooth prepared potato purée can also fit through many reusable pouch openings, provided it is thin and uniform enough that chunks do not clog the spout. Cooked potatoes are considered cooked leftovers from a food-safety perspective, so a homemade potato pouch should be kept properly cold and used within safe time limits rather than riding unrefrigerated in a backpack all day. 🥔 Other homemade smooth foods may physically fit the packaging, but ingredients such as dairy, eggs, cooked vegetables, meat, or other perishables can make temperature control especially important.
Texture Matters More Than You Might Expect
Before filling multiple pouches, prepare a small test portion and check whether the food can actually move through the opening without excessive squeezing. A potato mixture that works beautifully with a spoon can become frustrating when packed into a narrow spout, while excessively thin mixtures may leak more easily around imperfect seals. 💧 Smoothness, thickness, temperature, and the size of the pouch opening all influence how practical the food becomes outdoors.
Avoid assuming that adding water is always the best way to make a thick food pouch-friendly because additional water also increases carried weight while lowering calories per ounce of the finished portion. For a short hike that difference may be irrelevant, but backpackers carrying several days of food usually have stronger reasons to minimize unnecessary water weight. This is why dehydrated potato flakes prepared at camp can be more efficient for longer trips even though a ready-to-eat potato pouch may be more convenient for a short outing.
How To Calculate Calories And Carbohydrates Per Pouch
The easiest method is to calculate the nutrition for the entire prepared batch first, then divide it according to the number or weight of the portions you pack. Suppose your finished recipe contains 240 calories and 60 grams of carbohydrate and you divide it evenly among three pouches; each pouch contains approximately 80 calories and 20 grams of carbohydrate. 📊 The same approach works for sodium, fat, protein, or any other nutrient you want to monitor.
For recipes containing several ingredients, record the amount of each ingredient before mixing and use its package nutrition information or a reputable food-composition database to calculate the complete recipe. If the pouches are not equally filled, weigh the finished mixture and calculate nutrition per gram, then multiply that figure by the weight placed in each pouch. This is considerably more reliable than guessing based on the container’s advertised volume because fluid ounces, weight ounces, and food calories are not interchangeable measurements.
Reusable Food Pouches Vs Zip Bags Vs Containers
There is no perfect homemade trail-food container because saving weight usually requires accepting a compromise somewhere else. A reusable squeeze pouch offers direct eating and reasonable leak protection, while a freezer-grade zip bag is lighter and inexpensive but can be awkward for thick foods and may become messy when repeatedly opened. 🧪 A small screw-top container normally provides better structure and easier access but adds more bulk and container weight.
The best choice therefore depends on whether your priority is minimum weight, low cost, leak resistance, easy cleaning, or access with cold hands. Before buying packaging specifically for hiking, test whatever system you plan to use at home with the actual food rather than assuming it will behave like water. Caps, zipper seals, threads, corners, and seams can all trap food or become failure points after repeated use.
Homemade Trail Food Packaging Comparison
| Packaging type | Relative container weight | Common capacity | Leak resistance | Cleaning | Works best for |
|---|---|---|---|---|---|
| Reusable squeeze pouch | Light to moderate | Often about 3–7 oz depending on design | Good when properly sealed | Moderate | Applesauce and very smooth purées |
| Freezer-grade zip bag | Very light | Highly flexible | Moderate | Usually disposable or difficult to clean thoroughly | Thick mashed foods and short-term portions |
| Small screw-top container | Moderate to heavy | Wide range | Very good with a reliable lid | Easy | Thick purées and foods requiring spoon access |
| Manufacturer-sealed single-serve pouch | Varies | Fixed portion | Excellent before opening | None if disposable | Shelf-stable foods specifically packaged by the manufacturer |
Capacity and empty weight vary widely between manufacturers, so it is better to weigh your actual container on a kitchen scale than rely on a generic number. ⚖️ For hikers interested in pack optimization, weigh the empty pouch, weigh it again after filling, and subtract the packaging weight to determine how much food you are actually carrying. Repeating this experiment across several containers creates an original Pack-out Design comparison that is more useful than simply calling one packaging style “ultralight.”
Food Safety Rules For Homemade Trail Foods
One of the biggest mistakes with homemade trail food pouches is assuming that squeezing out air, closing a cap, or sealing a zip bag makes cooked food safe at outdoor temperatures. USDA food-safety guidance says perishable foods should generally not remain unrefrigerated for more than two hours, with that limit reduced to one hour when temperatures are above 90°F or 32.2°C. 🌡️ Cooked leftovers and dairy-containing foods are among the foods that require appropriate refrigeration, so a pouch of homemade mashed potatoes should not be presented as an all-day unrefrigerated backpacking snack.
Cold perishable food should generally be held at 40°F or below, which usually means using an insulated container with adequate cold sources when carrying it outdoors. Time spent packing, driving to the trailhead, hiking, resting, and waiting before eating can all contribute to how long food has been outside safe temperature control. A food can also become unsafe without developing an obvious bad smell or appearance, so “it still looks fine” is not a dependable trail-safety test.
Why A Sealed Pouch Is Not The Same As Shelf-Stable Food
Commercial shelf-stable products are produced using controlled formulations, processing methods, packaging systems, and safety procedures designed specifically for storage without refrigeration before opening. Filling a reusable pouch at home and screwing on the cap does not reproduce those manufacturing conditions, even when the container looks almost identical to the one on a supermarket shelf. 🔬 This distinction is especially important when comparing homemade applesauce pouches with commercially packaged shelf-stable applesauce.
Home-preserved foods require their own validated preservation methods, and hikers should not invent processing times or assume that vacuum sealing, squeezing out air, or using a tight closure makes a moist prepared food shelf-stable. When refrigeration cannot realistically be maintained, commercially shelf-stable foods, dry ingredients, dehydrated meals, nuts, tortillas, dried fruit, and similar packable options are generally easier to manage. The pouch should therefore be viewed primarily as a delivery system, not a preservation technique.
A Pre-Hike Packing And Leak-Test Checklist
Start the test the day before the hike rather than discovering a packaging problem several miles from the trailhead. Fill the pouch with the actual food, wipe the closure completely clean, seal it, gently squeeze it over a sink, turn it upside down, and leave it in several orientations to check for leakage. 🧼 Then practice opening, eating from, closing, and cleaning the pouch so you know whether the design is genuinely convenient.
Next, place the filled pouch inside the same backpack pocket or food bag you intend to use and surround it with typical gear to simulate compression. Check whether the cap can unscrew accidentally, whether sharp items can puncture the packaging, and whether you need a secondary leak-containment bag for protection. For refrigerated food, finalize your cold-storage method and eating schedule before leaving rather than relying on trail conditions to keep the food cool.
Build Different Pouches For Different Trip Types
For a short hike, a properly chilled homemade potato purée or another perishable soft food may be practical when it is kept safely cold and eaten within appropriate temperature-control limits. For an outing where refrigeration is inconvenient, a manufacturer-sealed shelf-stable applesauce pouch or another food specifically packaged for ambient storage may provide similar squeeze-and-eat convenience without pretending homemade packaging provides preservation. 🌲 The food system should change according to the duration, weather, available cooling, pack weight, and eating schedule.
For overnight and multi-day backpacking, the calculation changes again because carrying water-rich purées and cooling equipment can erase much of the weight advantage hikers seek. Dry potato flakes, dehydrated meals, powdered ingredients, and other foods rehydrated with water collected at camp can offer a more efficient Pack-out Design. Homemade trail food pouches therefore make the most sense when treated as one tool in a larger fueling strategy, rather than a universal replacement for bars, dry foods, or commercial trail products.