How to Dehydrate Ground Beef Safely for Backpacking Meals
Dehydrated ground beef is one of the most useful ingredients for homemade backpacking meals. It is lightweight, compact, rich in protein, and easy to combine with rice, pasta, beans, potatoes, vegetables, or instant sauces.
However, ground beef requires more attention than dehydrating fruits or vegetables. Because grinding increases the surface area of the meat and can distribute bacteria throughout the product, safe handling and adequate heating are essential.
If you’re preparing ground beef for trail meals, the goal is not simply to remove moisture. You need to combine safe cooking, controlled dehydration, proper cooling, and appropriate storage.
Here is a practical step-by-step approach.
Why Ground Beef Needs Extra Care
Whole cuts of beef have a relatively limited exposed surface. Ground beef is different because the meat is mechanically broken into small pieces.
Any bacteria present on the surface can become distributed throughout the ground meat during grinding.
That makes proper cooking particularly important before dehydration.
USDA recommends heating meat to 160°F (71.1°C) before the dehydration process when making homemade jerky. A food thermometer should be used rather than relying on color alone.
This is especially important because a dehydrator operating at a relatively low temperature should not be treated as a substitute for the initial cooking step.
Step 1: Choose Lean Ground Beef
Start with relatively lean ground beef.
Fat is undesirable in long-term dried food because it does not dehydrate like water. Remaining fat can become rancid and shorten the quality and storage life of the finished product.
The National Center for Home Food Preservation recommends trimming and discarding fat when preparing meat for drying.
For backpacking, leaner ground beef also tends to produce a lighter, cleaner finished ingredient.
You don’t necessarily need the most expensive beef available. A lean supermarket ground beef can work well when properly cooked and dehydrated.
Step 2: Keep the Meat Cold Before Cooking
Food safety begins before the pan is turned on.
Keep raw ground beef refrigerated at 40°F or below and use or freeze it within the recommended time. If the meat is frozen, thaw it in the refrigerator rather than on the kitchen counter.
Wash your hands before and after handling raw meat.
Use clean utensils, cutting boards, cookware, and work surfaces.
Try to minimize the amount of time the raw meat spends at room temperature.
These simple habits reduce the opportunity for bacteria to multiply or spread around your kitchen.
Step 3: Cook the Ground Beef Thoroughly
Place the ground beef in a skillet and cook it thoroughly.
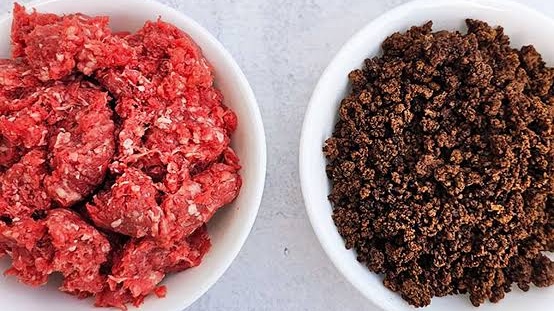
Break the meat into very small pieces as it cooks. Small pieces are useful later because they dry more evenly and rehydrate more easily.
Use a food thermometer to verify that the meat reaches 160°F.
Don’t depend on appearance alone.
USDA notes that food thermometers are the reliable method for determining whether the necessary internal temperature has been reached.
Once the beef has reached the appropriate temperature, drain off as much excess fat as practical.
This step is particularly important for backpacking food because excessive fat can negatively affect storage quality.
Step 4: Make the Pieces Small
After cooking, break up any large clumps.
You want relatively small, loose pieces rather than large chunks of ground beef.
Small pieces expose more surface area to the warm moving air inside the dehydrator.
They also make the finished beef easier to mix into trail meals.
Think about how you will eat it later.
A small piece of dehydrated beef can be combined directly with instant rice, noodles, soup, or other ingredients.
Large pieces may require more time to rehydrate.
Step 5: Prepare the Dehydrator
Use a food dehydrator that is designed for drying food and provides controlled temperature and airflow.
USDA’s current guidance for homemade jerky recommends a dehydrator that maintains approximately 130–140°F (54.4–60°C) during drying after the meat has been properly heated.
Follow the instructions provided with your particular dehydrator.
Do not overcrowd the trays.
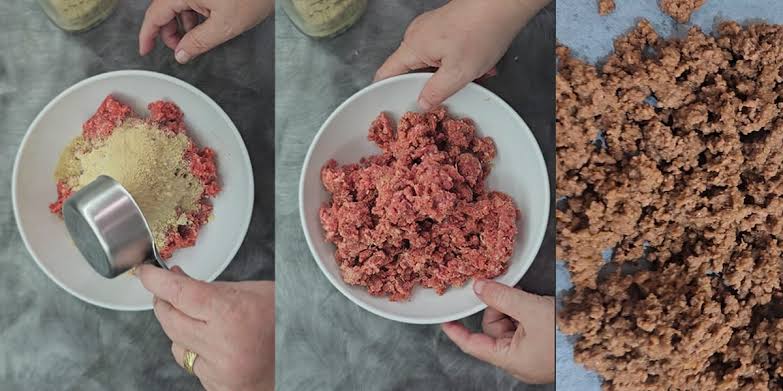
Spread the cooked ground beef into a thin, relatively even layer.
The goal is to expose as much of the surface as possible to moving air.
Step 6: Dehydrate Until Thoroughly Dry
Drying time varies.
It depends on the amount of meat, particle size, moisture level, dehydrator design, airflow, temperature, and humidity.
Instead of depending on one exact number of hours, monitor the food during the process.
The finished beef should be appropriately dry for the storage method you intend to use.
The National Center for Home Food Preservation notes that drying time for meat can vary substantially and recommends checking samples during the process.
Do not assume that a particular number of hours guarantees that every batch is finished.
Step 7: Cool the Beef Completely
This step is easy to overlook.
Once the beef is finished, remove it from the dehydrator and allow it to cool completely before packaging.
Do not immediately seal warm food inside a plastic bag.
Warm food can cause condensation inside the package, potentially introducing moisture back into the dried food.
The National Center for Home Food Preservation specifically recommends cooling dried foods completely before packaging.
Step 8: Package in Meal-Sized Portions
For backpacking, individual meal portions are convenient.
For example, you might package enough dehydrated beef for one dinner together with:
- Dehydrated rice
- Dried vegetables
- Seasoning
- Powdered sauce
- Salt and pepper
Label each package with the contents and preparation date.
Meal-sized packaging also reduces repeated exposure to air and moisture.
The National Center recommends packaging dried foods in amounts that can be used at one time because repeatedly opening a package exposes the food to air and moisture.
Step 9: Store It Properly
Dehydrated ground beef should not automatically be treated as an indefinitely shelf-stable food.
For the best quality and longer storage, the National Center for Home Food Preservation recommends refrigerating or freezing homemade jerky.
If you are building a backpacking food supply, consider making smaller batches and storing them appropriately until the trip.
Keep dried food in a cool, dry, dark location when appropriate for the particular product and storage method.
Heat can reduce storage life.
Step 10: Rehydrate It on the Trail
Ground beef is particularly useful because it can be incorporated into meals rather than eaten only as jerky.
At camp, combine the dried beef with hot water and other ingredients.
Possible combinations include:
Beef + rice + vegetables: A simple one-pot dinner.
Beef + pasta + sauce powder: A lightweight pasta meal.
Beef + beans + chili seasoning: A homemade backpacking chili.
Beef + mashed potatoes + gravy: A hearty cold-weather meal.
Allow enough time for the beef to absorb water and soften.
Common Mistakes to Avoid
One mistake is assuming that dehydration itself makes unsafe meat safe.
It doesn’t.
USDA explains that bacteria can survive when meat is dried without first receiving the appropriate heat treatment because the dehydrator’s low temperature may not destroy them before the meat loses enough moisture.
Another mistake is leaving excessive fat in the finished product.
A third is sealing warm food immediately after dehydration.
Finally, don’t use smell or appearance alone as proof that stored meat is safe.
When in doubt about questionable food, discard it.
Final Thoughts
Dehydrated ground beef can be an excellent backpacking ingredient, but food safety needs to be part of the recipe from beginning to end.
Keep the raw meat cold, work with clean equipment, cook it to 160°F, remove excess fat, break it into small pieces, dehydrate it properly, cool it completely, and package it carefully.
Once you have a safe process, homemade dried ground beef becomes incredibly versatile.
It can turn inexpensive grocery-store ingredients into lightweight trail dinners that are easy to customize.
For backpackers who want more protein without carrying fresh meat, learning how to prepare ground beef correctly can be a valuable addition to a DIY trail-food system.