Repackaging Freeze-Dried Meals: The Complete Freezer Bag Cooking Guide for Backpackers
Freeze-dried meals are convenient, lightweight, and popular with backpackers, but the original packaging is not always the most efficient way to carry them. Large meal pouches can take up valuable space in a backpack, especially when you are also carrying a bear canister, stove, fuel, water, and several days of snacks.
That is where repackaging freeze-dried meals for freezer bag cooking can make a noticeable difference.
Instead of carrying bulky commercial pouches, you can transfer many dry ingredients into sturdy heat-resistant bags, label them before the trip, and prepare meals by adding hot water directly to the bag.
The result can be a lighter, more organized food system with less packaging to carry into the wilderness.
However, freezer bag cooking requires more than simply dumping food into an ordinary plastic bag. You need to choose appropriate materials, understand which ingredients work well, control moisture, and use safe cooking practices.
Here is a practical guide to getting started.
Why Repackage Freeze-Dried Meals?
The original pouch that contains a commercial freeze-dried meal is designed for convenience. It usually stands upright, holds boiling water, and provides insulation while the meal rehydrates.
That convenience comes with extra bulk.
A backpacker carrying seven dinners may have seven relatively large pouches taking up valuable volume.
Repackaging can reduce the amount of unused packaging and allow meals to conform more closely to the shape of your food bag or bear canister.
It can also make meal planning easier.
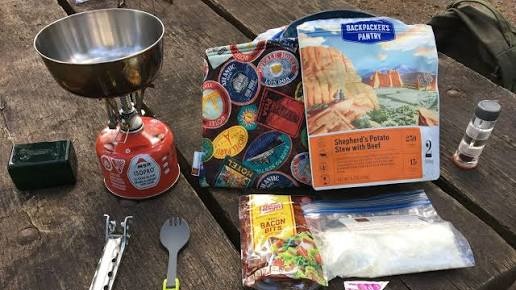
Instead of carrying several complete commercial meals, you can create individual servings from ingredients you already use.
For example, one bag might contain:
- Freeze-dried chicken
- Instant rice
- Dried vegetables
- Seasoning
- Powdered sauce mix
Another could contain:
- Instant mashed potatoes
- Dehydrated vegetables
- Cheese powder
- Bacon bits
- Seasoning
You can customize calories, protein, carbohydrates, and flavor without being limited to a manufacturer’s menu.
Choose the Right Bag
This is one of the most important parts of freezer bag cooking.
Do not assume every plastic storage bag is appropriate for direct contact with boiling water.
Use bags specifically designed and marketed for high-temperature food use when your cooking method involves adding boiling water. Follow the manufacturer’s temperature and food-contact instructions.
The bag needs to be strong enough to hold hot food and water without leaking.
Heavy-duty freezer bags are commonly used by backpackers, but the exact product matters. Check the packaging before your trip.
A bag that works perfectly for storing frozen food is not necessarily designed for prolonged exposure to boiling water.
Build Meals From Dry Ingredients
Freezer bag cooking works best when most ingredients are already fully cooked or dehydrated.
Good choices include:
- Instant rice
- Couscous
- Instant noodles
- Instant mashed potatoes
- Dehydrated vegetables
- Freeze-dried meat
- Dried beans
- Lentils that have been appropriately precooked and dehydrated
- Powdered sauces
- Dried cheese
- Instant oatmeal
The key concept is rehydration.
You are not using the bag to cook raw meat or other ingredients that require conventional cooking. You are adding hot water to ingredients that have already been processed so they can safely and effectively rehydrate.
Make Each Meal a Complete Package
Before your trip, assemble each dinner as a single serving.
For example:
Chicken Rice Bowl
- ½ cup instant rice
- Freeze-dried chicken
- Dehydrated vegetables
- Chicken bouillon
- Dried herbs
- Sauce powder
Put all dry ingredients into the bag.
Then label the outside:
Chicken Rice Bowl — Add 1½ cups boiling water — Wait 10 minutes
The exact water quantity and time depend on the ingredients, so test the recipe at home first.
This is one of the biggest advantages of freezer bag cooking: you can turn dinner into a simple two-step process.
Label Everything
Never rely on memory.
Write the following information on each bag:
- Meal name
- Water amount
- Rehydration time
- Calories
- Any special instructions
You can also label the day:
Day 4 — Chicken Curry
This makes meal organization much easier after several days on the trail.
For cold-weather trips, clear labeling is especially useful because nobody wants to stand around comparing mystery bags while wearing gloves.
Test the Meal at Home
A recipe that looks perfect on paper can fail on the trail.
Maybe the rice needs more water.
Maybe the vegetables remain crunchy.
Maybe the sauce becomes too thick.
Maybe the meal tastes bland after dehydration.
Test every new recipe at home.
Use the same water temperature and approximately the same waiting time you plan to use outdoors.
If the recipe requires 12 minutes rather than 8, write that on the bag.
Home testing also lets you determine the correct serving size.
The “Add Water and Wait” Method
The basic process is simple.
Step 1: Boil Water
Heat the amount required by the recipe.
Step 2: Open the Meal Bag
Place the bag on a stable surface.
Step 3: Add Hot Water
Pour the specified amount into the bag.
Step 4: Stir Carefully
Mix the ingredients so that dry pockets do not remain.
Step 5: Seal the Bag
Close it according to the bag’s design.
Step 6: Insulate
Place the bag inside a cozy, insulated pouch if desired.
Step 7: Wait
Allow the ingredients to rehydrate for the specified time.
Step 8: Stir Again
Mix thoroughly before eating.
A lightweight insulated cozy can help maintain temperature while the meal rehydrates.
Why an Insulated Cozy Helps
Once boiling water is added, the temperature starts dropping.
An insulated cozy reduces heat loss and can help food rehydrate more evenly.
You can purchase a commercial cozy or make one from suitable reflective insulation material.
The cozy does not need to be complicated.
The important purpose is to keep the meal warm while you wait.
This can be particularly useful when temperatures are low.
Reduce Cleanup
Freezer bag cooking has another advantage: minimal dishwashing.
If the meal is prepared inside the bag, your cooking pot is mainly used for heating water.
That means you do not need to scrub a pot covered with rice, sauce, cheese, or mashed potatoes.
For long-distance backpacking, reducing cleanup can save both time and water.
However, remember that used food bags become trash.
Pack them out and manage them according to the area’s regulations.
How to Repackage Commercial Freeze-Dried Meals
You do not necessarily need to create every recipe from scratch.
If you already like a commercial freeze-dried meal, you can sometimes transfer its contents into a suitable food-storage bag.
Before doing this, check the original preparation instructions.
Record:
- Food amount
- Required water
- Rehydration time
- Any ingredients that should be added separately
Do not discard the original instructions until you have written down everything you need.
For long trips, photographing the instructions before repackaging can provide a useful backup.
Bear Canister Considerations
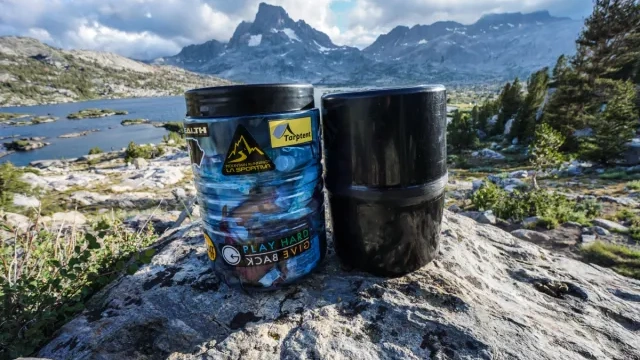
Repackaging can be especially useful when a bear canister is required.
Large commercial meal pouches contain empty air and packaging material.
Flat, flexible bags can conform to the available space more efficiently.
This can make it easier to fit several days of meals into a limited-volume canister.
However, food storage regulations vary by park and wilderness area. Your repackaged meals still need to be stored according to the local requirements.
Also remember that the packaging itself can become scented trash after the meal is eaten.
Foods That Do Not Work Well
Not every food belongs in a freezer bag cooking system.
Avoid using this method as a substitute for properly cooking raw meat or other foods that require complete cooking.
Fresh ingredients can also create storage and spoilage problems.
Foods with high fat content may require additional care because oils can leak or turn rancid during storage.
Test anything new before relying on it in the wilderness.
Final Thoughts
Repackaging freeze-dried meals is one of the simplest ways to create a more efficient backpacking food system.
The basic idea is straightforward: move dry ingredients into suitable food-safe packaging, label each meal, test the recipe at home, add hot water on the trail, and allow the food to rehydrate.
The biggest benefits are reduced packaging bulk, easier organization, less cleanup, and greater control over your menu.
But the process should be treated as food preparation rather than simply transferring ingredients from one bag to another.
Choose appropriate bags, avoid using the method to cook foods that require conventional cooking, test recipes before a trip, and follow local food-storage rules.
Once you have a few reliable recipes, freezer bag cooking can turn dinner into one of the easiest parts of your backpacking day.