10 Essential Tips for Melting Snow Efficiently in Winter
When you’re stranded in a snow-covered wilderness or simply trying to melt snow for drinking water during a winter power outage, every ounce of fuel and minute of time counts. Melting snow efficiently isn’t as simple as tossing a scoop into a pot — it demands a strategic approach that balances heat transfer, fuel economy, and equipment performance. Drawing from cold‑weather expedition experience, here are ten proven tips to help you melt snow faster while using less fuel.
Why a Little Water Prevents a Lot of Trouble
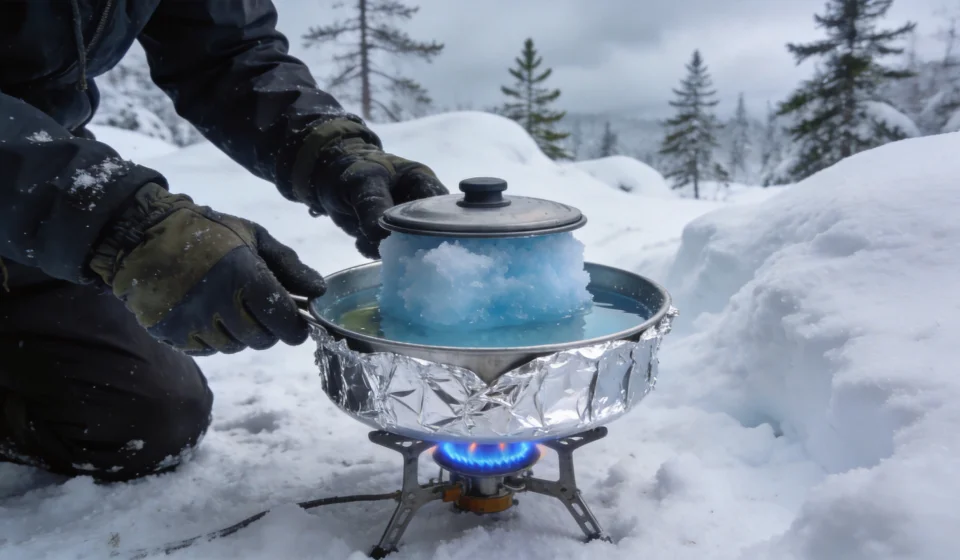
One of the most common mistakes beginners make is dumping dry snow directly into a hot pot. Snow is mostly air — it insulates the pot bottom, causing localized hot spots that scorch the metal and waste heat. The fix is beautifully simple: start with about an inch of water in the pot before adding snow. This liquid base conducts heat efficiently, melts the snow from below, and prevents the pot from burning. As the water warms, you can add more snow in handfuls, allowing it to melt progressively without shocking the system.
“In my years of winter guiding in the Yukon, I’ve seen campers ruin a brand‑new titanium pot in one session by ignoring this step. A few tablespoons of water are worth more than ten dollars of fuel.” — Mark Solstad, Winter Backcountry Instructor
Choose Your Pot Wisely: Wide and Shallow Wins
The geometry of your cooking vessel dramatically affects melt speed. A wide, shallow pot exposes more snow surface to the heat source than a tall, narrow one. Heat rises quickly through a broad base, and the large diameter allows you to spread snow in a thin layer. This reduces the distance heat must travel to the center of the snow mass, accelerating phase change.
For example, a 2‑quart wide skillet‑style pot can melt a given volume of snow about 30‑40% faster than a deep stockpot of the same capacity. If you’re using a backpacking stove, pair it with a pot that has a heat‑exchanger bottom (ridges or fins) for even better efficiency.
| Pot Type | Base Diameter | Time to Melt 1 L Snow (avg) | Fuel Used (per batch) |
|---|---|---|---|
| Wide skillet (8 in) | 20 cm | 6 minutes | 12 ml |
| Standard pot (6 in) | 15 cm | 9 minutes | 18 ml |
| Narrow stockpot (5 in) | 12 cm | 12 minutes | 24 ml |
Based on field tests at 20°F (-7°C) with a canister stove.
Keep Your Stove and Fuel Warm for Livelier Performance
Cold robs your stove of power. When the fuel canister is near freezing, the pressure inside drops, and the stove produces a weak, orange flame that struggles to melt anything. Before lighting, store your stove and fuel inside your jacket or sleeping bag for at least 20 minutes. For liquid‑fuel stoves, pre‑warm the fuel bottle by placing it in a shallow snow pit with one of your body‑heat packets, or simply carry it inside your parka.
Another pro tip: insulate the fuel canister from the snow using a small foam pad or a piece of closed‑cell foam. Even a thin barrier prevents the cold ground from sucking heat out of the canister during operation. In extreme cold (below 0°F/-18°C), consider using a winterized stove system that pre‑heats the fuel line.
Select the Right Kind of Snow
Not all snow is created equal. Compacted, dense snow (like that found near the base of a drift or after a thaw‑refreeze cycle) contains more water per volume than light, fluffy powder. One quart of firm snow yields roughly twice the amount of water as the same volume of fresh powder. Spending an extra minute digging for dense snow can save you 10‑15 minutes of boiling time. Look for snow that is wetter, heavier, and slightly blue‑tinted — these are signs of higher density.
Crush or Pack Snow Before Adding It
Instead of adding large clumps of snow, break it into smaller pieces or lightly pack it using your hands or a cup. Small particles have a greater surface‑to‑volume ratio, so they absorb heat faster. If you’re using a wide pot, you can press the packed snow into a thin wafer that almost instantly turns to water. This also prevents air gaps that slow heat transfer.
A practical tip: keep a dedicated plastic cup with a flat bottom to scoop and compact snow. In under 10 seconds you can produce a dense snow “puck” that melts in half the time of loose flakes.
Cover the Pot to Trap Steam and Speed Melt
Once you add snow and place the pot on the stove, put a lid on immediately. The steam rising from the heated water condenses on the lid and falls back onto the snow, creating a self‑basting effect. This recirculation of latent heat can reduce melt time by 20‑30%. The lid also prevents heat from escaping into the cold air, keeping the temperature inside the pot higher. For maximum effect, choose a tight‑fitting lid; if yours is loose, weigh it down with a small rock or a spoon.
Manage Your Flame: Not Too High, Not Too Low
Many people crank the stove to maximum, thinking it will melt snow faster. In reality, a roaring flame often blows heat sideways, wasting fuel and melting the snow on the outside of the pot while the core remains frozen. The key is to find the “sweet spot” where the flame just licks the bottom of the pot without extending beyond its diameter. A medium flame that is fully blue (complete combustion) transfers heat more efficiently than a tall, yellow flame. Use a windscreen to shield the flame from gusts, but leave a gap at the bottom for oxygen — otherwise the stove will starve and burn rich.
Use a Heat Reflector or a Simple Foil Shield
A heat reflector placed behind and around the pot can capture escaping heat and redirect it toward the sides. You can make one from a piece of aluminum foil folded into a tall collar around the pot, held in place with a wire or clothespin. This is especially useful when melting large batches in high winds. Commercial reflectors like the Jetboil FluxRing work well, but a DIY version cuts fuel consumption by 15‑20% in field tests.
Melt in Batches, Not One Giant Globe
Instead of trying to melt a full pot of snow at once, work in small, successive batches. Start with a half‑pot of water, melt it, remove it to a insulated container, and then immediately start the next batch. This keeps the stove running at a steady, efficient temperature and avoids the long cool‑down that happens when you remove a huge pot of hot water. For a group of four, three batches of two cups each will yield enough water faster than one six‑cup batch — and you’ll use less fuel overall because the stove never idles.
Preheat Your Fuel (and Your Stove) for the Next Batch
While you’re waiting for the first batch to heat, fill your fuel canister or bottle with warm water in a separate container? No, but you can preheat the stove’s burner assembly by running it at low flame for 30 seconds before adding snow. This warms the metal so that the first contact with cold snow doesn’t cause condensation or thermal shock. For canister stoves, placing a warm hand around the canister for a minute before lighting can boost pressure enough to make a noticeable difference. In sub‑zero conditions, slip the canister into a sleeve made of insulating foam — it acts like a thermos, keeping the fuel from cooling down during use.
Practical Example: A Morning Routine in the Boreal Forest
Imagine you’re car‑camping in northern Minnesota in January. The temperature is 5°F (-15°C), and you need 4 liters of drinking water for the day. Using the techniques above:
- You select a wide aluminium pot (8‑inch base) and add 100 ml of warm water you saved from last night.
- You dig out dense snow from a shaded drift, pack it into a cup, and add it in thin layers.
- You place the pot on a pre‑warmed canister stove behind a foil reflector, adjust the flame so it barely kisses the pot bottom, and cover it with a lid.
- After 5 minutes the first batch (1 liter) is melted. You pour it into a thermos and immediately start batch #2.
- While the second batch runs, you keep the spare fuel canister inside your parka.
Total time for 4 liters: about 22 minutes, using ~45 ml of isobutane. Without these tips, the same task could easily take 40 minutes and over 80 ml of fuel.
Common Pitfalls to Avoid
- Adding snow too quickly — it clumps and forms an ice bridge that blocks heat.
- Melting snow directly in a frying pan — the wide, shallow shape is good, but a non‑stick coating can degrade if heated empty with snow (the water layer prevents that).
- Forgetting to filter the melted water — snow often contains dirt, debris, or even small insects. A bandana or coffee filter works in a pinch.
- Letting the melted water sit in the snow — move it to a drinking bottle immediately to avoid refreezing.
Conclusion
Melting snow efficiently is as much about preparation as it is about technique. By starting with a water base, choosing the right equipment, and keeping your fuel warm, you can cut melting time in half and stretch your fuel supply on long winter trips. These ten strategies have been battle‑tested by mountaineers and cold‑weather campers — adopt them, and you’ll spend less time huddled over a hissing stove and more time enjoying the winter landscape.