How to Repackage Freeze-Dried Backpacking Meals for Easy Freezer Bag Cooking
Backpacking food has two major problems: it can be heavy, and it can take up far more space than expected.
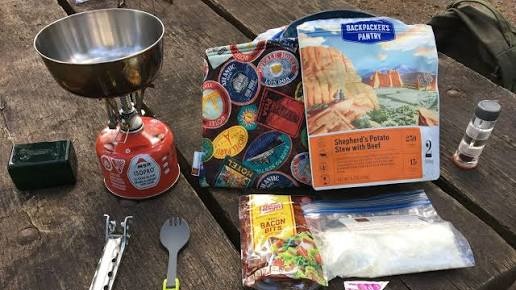
Freeze-dried meals solve part of the problem because they are lightweight and require little preparation. But commercial meal pouches can still consume significant space, especially when you are preparing for a five-, seven-, or ten-day trip.
For backpackers who want to maximize every cubic inch, repackaging freeze-dried meals into freezer-bag cooking portions can be a useful strategy.
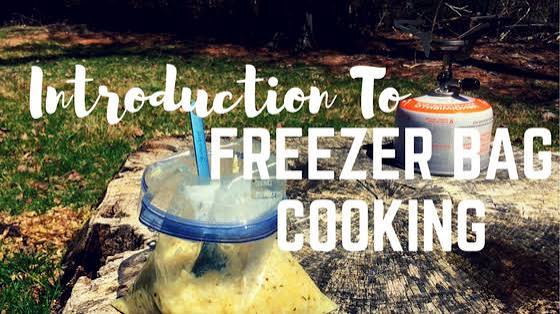
The concept is simple. Instead of carrying a separate bulky pouch for every dinner, you prepare compact dry meal portions before leaving home. On the trail, you add hot water, seal the bag, wait, stir, and eat.
This approach can also make your meals more customizable.
You can combine freeze-dried meat with instant carbohydrates, dehydrated vegetables, spices, cheese powder, and sauces to create meals that fit your calorie requirements and taste preferences.
Start With a Menu, Not a Bag
Before buying packaging, design your menu.
For every day, decide what you will eat for:
- Breakfast
- Lunch
- Snacks
- Dinner
- Drinks
Then calculate approximate calories.
For example, a demanding backpacking day might require a substantial amount of food, but calorie requirements vary from person to person and depend on factors such as body size, temperature, terrain, and activity level.
Once you know your target, you can decide how much food belongs in each meal.
This prevents a common mistake: repackaging food first and discovering later that your daily menu does not contain enough energy.
Think in Meal Components
Instead of buying only complete freeze-dried dinners, think about individual components.
A simple backpacking dinner might consist of:
Carbohydrate: instant rice
Protein: freeze-dried chicken
Vegetables: dehydrated peas and carrots
Flavor: curry powder and bouillon
Fat: powdered coconut milk or another shelf-stable fat-containing ingredient appropriate for the recipe
You can adjust each component separately.
That gives you much more flexibility than a fixed commercial meal.
Repackage Dry Ingredients Carefully
Use clean, dry equipment when assembling meals.
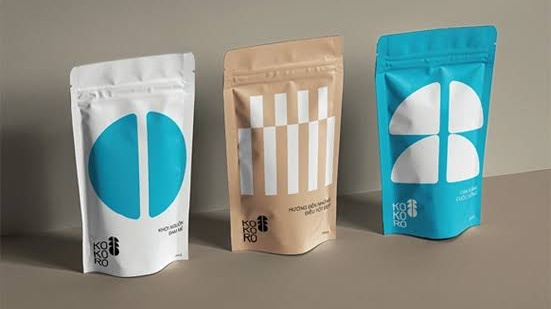
Measure each ingredient into a suitable food-safe bag.
For example:
Backpacking Chicken Curry
- Instant rice
- Freeze-dried chicken
- Dehydrated vegetables
- Curry seasoning
- Powdered coconut milk
- Salt
Seal the bag securely.
Then label it with the preparation instructions.
Do not rely on a handwritten ingredient list from memory after several days on the trail.
Write the Water Amount on Every Bag
This tiny step can save a surprising amount of frustration.
Write:
ADD 1½ CUPS HOT WATER
rather than simply writing “add water.”
Even better, include the approximate volume in both cups and milliliters if you use different measuring systems.
Then write:
WAIT 10 MINUTES
The goal is to make dinner almost automatic.
After a long day of hiking, you should not need to calculate water ratios from memory.
Make a Freezer Bag Cooking Cozy
A simple insulated cozy can make this system work better.
The basic idea is to place the sealed meal bag inside an insulated container immediately after adding hot water.
The insulation slows heat loss while the food rehydrates.
A cozy can be particularly helpful when the outside temperature is low or when a meal needs several minutes to fully soften.
You can purchase a purpose-built backpacking food cozy or construct one from appropriate insulation materials.
Keep the design simple.
You do not need a complicated cooking system when the meal itself has already been prepared for rehydration.
Rehydration Is the Real Cooking Process
Freezer bag cooking is technically closer to rehydration than conventional cooking.
The food has already been cooked, dehydrated, freeze-dried, or otherwise prepared before you reach the trail.
Your hot water restores moisture and heat.
This distinction matters.
Do not place raw meat or other ingredients requiring complete cooking into a freezer bag and assume boiling water will make them safe.
Your recipes should be designed around ingredients that are already safe to consume after proper rehydration.
How Much Water Should You Use?
There is no universal amount.
Different foods absorb different amounts of water.
Instant rice may need one quantity.
Couscous may need another.
Mashed potatoes can require much less.
Freeze-dried vegetables may need additional soaking time.
The best solution is to test the meal at home.
Measure the water carefully.
Add it to the bag.
Wait the intended time.
Then evaluate the texture.
If the meal is too dry, increase the water slightly.
If it is soupy, reduce it.
Record the final amount on the bag.
Build a Meal That Rehydrates Evenly
Ingredient size matters.
Large pieces of dehydrated vegetables may take longer to soften than powdered sauces or instant grains.
If one ingredient requires significantly more time than another, consider pre-soaking it or choosing a different ingredient.
You can also crush large ingredients into smaller pieces before packaging.
However, do not turn everything into powder. Texture is part of the enjoyment of a trail meal.
A good backpacking dinner should be compact without becoming unpleasant to eat.
Use Repackaging to Save Canister Space
For trips requiring a bear canister, volume becomes particularly important.
A commercial freeze-dried meal pouch may contain considerable unused air.
A flexible bag can conform to the available space inside a canister.
Pack dense, flat items along the sides and bottom, then use flexible packages and smaller ingredients to fill gaps.
This approach can help maximize available volume.
But remember that food-storage regulations vary. In areas requiring an approved bear-resistant container, repackaging does not change the requirement. The meal still needs to be stored in the legally required system.
Plan for Trash From Day One
A freezer bag cooking system does not eliminate waste.
It changes the type and amount of waste.
After dinner, the used meal bag may still smell strongly of food.
Do not leave it outside your required food-storage system.
If your destination requires food, trash, and scented items to be secured in a bear-resistant container, the empty meal bag may need to go back inside.
This is another reason to consider packaging volume when planning a trip.
Your canister needs to handle not only tomorrow’s food but eventually the packaging from yesterday’s meals.
Create a Seven-Day Meal Rotation
For a longer trip, variety can prevent food fatigue.
A sample rotation might look like:
Day 1: Chicken rice curry
Day 2: Cheesy mashed potatoes with vegetables
Day 3: Peanut noodles with dehydrated vegetables
Day 4: Chili rice with beans
Day 5: Chicken couscous
Day 6: Creamy potato and vegetable soup
Day 7: Pasta with tomato sauce and freeze-dried meat
The exact recipes are up to you.
The important concept is to rotate textures and flavors.
A seven-day trip does not have to mean eating the same freeze-dried meal every night.
Don’t Forget Breakfast and Lunch
Freezer bag cooking is not limited to dinner.
Breakfast can be as simple as:
- Instant oatmeal
- Powdered milk
- Dried fruit
- Nuts
- Cinnamon
Lunch can involve a cold-soak or minimal-cooking approach:
- Tortillas
- Peanut butter
- Tuna
- Jerky
- Hard cheese where appropriate
- Crackers
Using similar packaging throughout your food system makes organization easier.
Home Testing Is Non-Negotiable
Never take an untested recipe into the wilderness.
Make it at home.
Use the exact bag type.
Measure the exact water quantity.
Wait the intended amount of time.
Then eat it.
Ask yourself:
- Is the texture acceptable?
- Is there enough food?
- Is the seasoning strong enough?
- Does the bag leak?
- Is the meal too watery?
- Is it difficult to stir?
- Does it remain hot enough?
- Is cleanup easy?
Fix the problems before your trip.
Store and Label Your Meals by Day
Once everything is prepared, organize meals by day.
You can write:
D1 DINNER
D2 DINNER
and so forth.
For more detailed organization, include:
- Meal name
- Calories
- Water requirement
- Rehydration time
This makes your food system easier to manage and helps you monitor how much food remains.
Final Thoughts
Repackaging freeze-dried meals can transform a collection of bulky commercial pouches into a compact, organized backpacking food system.
The basic process is straightforward:
Plan → measure → repackage → label → test → pack → rehydrate.
The biggest advantages are flexibility and efficiency. You can customize calories, ingredients, flavors, and portion sizes while reducing unnecessary packaging bulk.
The most important safety principle is equally simple: use appropriate food-safe packaging and only use freezer-bag cooking for ingredients that are suitable for rehydration. Do not rely on boiling water in a bag as a substitute for properly cooking raw foods.
Finally, remember that food storage does not end when dinner is finished. Used bags, wrappers, and other scented waste may still need to be secured according to the regulations of your camping area.
Once you have tested several reliable recipes, freezer bag cooking can become a practical system for everything from a weekend overnight to a week-long backpacking adventure.