How to Share a Stove and Save Weight on Group Hikes
When you hit the trail with a group, every ounce in your pack feels like a pound by mile ten. One of the smartest moves a hiking party can make is to ditch the “one person, one stove” mentality and share a single stove and cookset. This isn’t just about saving weight—it’s about building a collaborative system that makes camp life smoother, more efficient, and even more social. Let’s break down exactly how much weight you can save, how to coordinate meals without chaos, and how to keep the system fair for everyone involved.
How Much Weight You Actually Save by Sharing
The math is simple but powerful. A typical backpacking stove (like a PocketRocket or a BRS-3000T) weighs between 1.5 and 3 ounces. A 1-liter ultralight pot runs 3–5 ounces. A canister of isobutane adds another 8–10 ounces. Add in a tiny windscreen and lighter, and you’re looking at roughly 12–15 ounces per person if each hiker carries their own setup. But if four people share one stove and one pot, you carry only one set—saving roughly 10 ounces per person.
Here’s a real-world comparison based on common gear choices:
| Group Size | Total Shared Weight (stove + pot + fuel) | Weight Per Person | Weight Saved Per Person vs. Solo |
|---|---|---|---|
| 2 people | 15 oz | 7.5 oz | 7.5 oz |
| 3 people | 16 oz (larger pot or extra fuel) | 5.3 oz | 9.7 oz |
| 4 people | 18 oz (requires larger pot, ~2L) | 4.5 oz | 10.5 oz |
| 5 people | 20 oz (bigger pot + more fuel) | 4 oz | 11 oz |
These numbers assume you switch from a solo 1-liter pot + stove to a shared 1.5–2L pot. The savings are even larger if someone already carries a heavy multi-fuel stove. The takeaway: in a group of four, each person frees up over half a pound—enough for an extra luxury item like a Kindle or a pack of beer for camp.
Meal Coordination: The Art of the Cooking Schedule
Sharing one burner means you can’t have four people boiling water at the same time. That’s actually a good thing—it forces you to plan meals together, which reduces food waste and prevents everyone from hunching over separate stoves in the dark. The key is to design a cooking rotation that matches your group’s rhythm.
Step 1: Align on meal complexity
Not every dinner needs to be a gourmet affair. Agree ahead of time on a hybrid approach: two or three people eat simple no-cook meals (tortillas with PB&J, summer sausage, cheese) while the others cook a hot meal. Alternatively, batch-cook one communal dinner (like a big pot of pasta or chili) for the whole crew. That single boil serves everyone.
Step 2: Stagger the cook times
Create a timeline like this:
- 6:00 PM – 6:15 PM: First person boils water for their dehydrated dinner + a hot drink.
- 6:15 PM – 6:35 PM: Second person uses remaining hot water for another freeze-dried bag, or rehydrates a meal that just needs a short soak.
- 6:35 PM – 6:50 PM: Third person cooks something quick like ramen with an added egg packet.
- 6:50 PM onward: Fourth person uses the stove for tea, cocoa, or to heat a small can of soup.
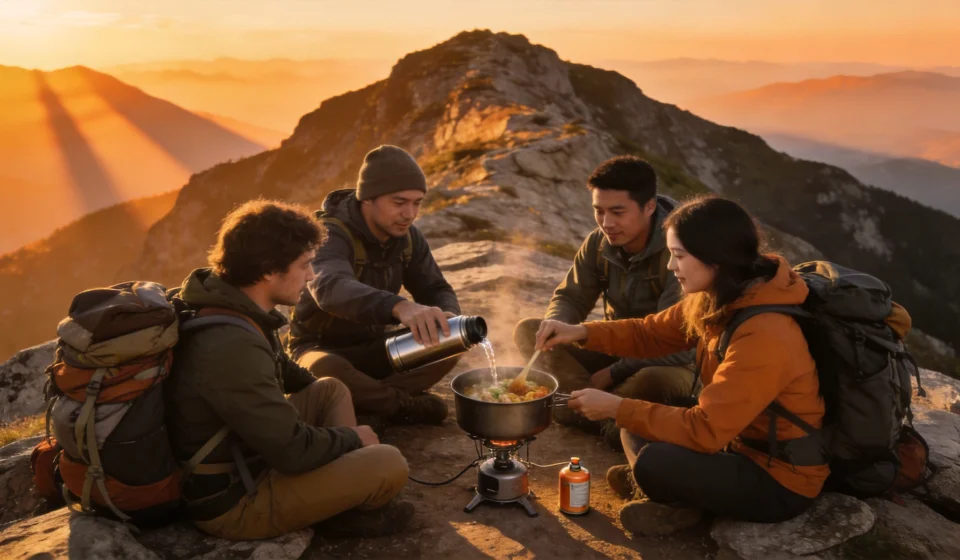
This works perfectly if everyone has a wide-mouth thermos or a cozy to hold their hot water. Pro tip: boil extra water on the first burn and pour it into a thermos for the next person—they can rehydrate without touching the stove.
Step 3: The “assembly line” breakfast
Morning is even tighter. Use an assembly-line system: one person boils water, then pours it into everyone’s mugs for oatmeal or coffee. While the first person eats, the next person scrambles eggs in the same pot with a bit of oil. The pot gets wiped clean with a bandana between users. No one waits more than five minutes.
Real group example: On a 5-day trip in the Wind River Range, our team of six shared two stoves—but we quickly realized one stove was enough for dinner because we staggered our meals. We used one stove for hot water and the other for cooking fresh ingredients on alternate nights. The group saved 1.2 pounds per person overall, and no one felt rushed.
Fairness & Logistics: Who Carries What, Who Cleans, Who Pays?
Sharing gear sounds great until someone ends up carrying the heavy stove every day or scrubbing the pot alone while everyone else relaxes. A fair system requires upfront agreements on three things: weight distribution, cleanup duties, and fuel costs.
Weight distribution
Don’t just hand the stove to the strongest hiker. Instead, break the cookset into components and rotate who carries what each day:
- Day 1: Person A carries the stove + fuel canister. Person B carries the pot + lids.
- Day 2: Swap. Person B takes the stove + fuel. Person A carries the pot.
- Day 3: Add the extra fuel canister or windscreen to another member’s pack so the load stays balanced.
If your group uses a lightweight frying pan or a small cutting board, distribute those items to different people each day. Use a simple gear rotation checklist in a shared note on your phone to avoid confusion.
Cleanup responsibilities
The person who cooks should not be the only one who cleans. Set a rule: Whoever eats last cleans the pot. Or, assign a “kitchen manager” per meal who is responsible for boiling water and wiping out the pot afterward. Rotate that role each meal. To make cleanup easy, use collapsible silicone bowls so no one has to scrub the actual pot except for a quick rinse.
Fuel cost and resupply
Should everyone chip in equally for the canister? Yes. But what if one person drinks three cups of hot tea every night while another only uses boiling water for dinner? The simplest approach: split the fuel cost equally, and buy one extra canister for the trip. If you run out, the group buys another. For long-term fairness, keep a running tally of how many boils per person and adjust next trip—but honestly, the difference is usually small enough that equal splits work.
Optional: The “cookset deposit” system
Some groups create a small pool of cash ($5 per person) before the trip. Anyone who forgets to clean the pot, loses the lid, or fails to show up with their assigned gear pays a fine from the pool. At the end of the trip, the remaining money buys a round of beers. This incentivizes responsibility without hard feelings.
Packing Tips for a Shared Kit
A few practical tricks make sharing seamless:
- Use nesting cookware
- Choose a pot that can stack inside another pot, or one that holds the stove and fuel canister inside. This reduces bulk and protects fragile parts.
- Label your bowls
- Each person brings their own mug and spoon, but the communal pot gets a small piece of tape with the group’s name or a symbol. This avoids mix-ups.
- Pre-measure fuel
- Weigh your canister before leaving. If you know you’ll need about 2.5 ounces of fuel per person per day, you can decide how many canisters to carry. For a 3-person, 4-day trip: 3 × 4 × 2.5 = 30 oz of fuel, i.e. two 8-oz canisters plus one small leftover.
When Sharing Doesn’t Work (and What to Do Instead)
Not every group is a good fit for a single stove. If you have hikers with vastly different dietary needs (e.g., one person eats gluten-free, another is vegan, a third needs high-calorie meals every two hours) or if some enjoy elaborate cooking while others want to eat cold tortillas, forcing everyone to share one burner may cause resentment. In those cases, consider a two-stove solution: one “main” stove for the group and one ultralight micro-stove for specific needs. You’ll still save weight by not carrying four stoves, and each subset of hikers gets autonomy.
Another edge case: if your group includes a fast-pack runner who hikes ahead and eats alone, they should carry their own stove. Sharing only works when people are within 15–20 minutes of each other at meal time.
The Bigger Picture: Team Bonding Over the Flame
Beyond the ounces you save, sharing a stove forces you to talk, laugh, and negotiate—you learn each other’s preferences, trade trail stories while waiting for water to boil, and develop a rhythm that makes the whole trip feel more connected. On a solo hike, cooking is a chore. On a group hike with a shared kit, it becomes the campfire without the fire: a focal point for community.
“On the Appalachian Trail, my tramily of four shared one MSR PocketRocket for six straight weeks. We saved about 11 ounces each—enough to carry an extra book and a deck of cards. But more importantly, we never had to wait for someone to dig through their pack for a stove. We worked out a system, and it made us trust each other. That trust carried us through food boxes, bad weather, and mid-day arguments.” – Alex, PCT hiker 2022
Final Checklist Before You Hit the Trail
- Confirm group size and meal styles. Write down who will eat what, and how many hot meals per day.
- Weigh every item. Use a kitchen scale and assign rotational carriers.
- Set a cooking timeline. Have a screenshot of the schedule on your phone.
- Agree on a cleanup protocol. Print a small card with rules if needed.
- Split fuel costs evenly. Bring an extra lighter and a backup stove valve (just in case).
- Test the system. Do a dry run in your backyard or at a car camp before the multi-day trip.
Sharing a stove and pot on a group hike isn’t just about saving grams—it’s about making every ounce of gear serve the whole team, not just one person. With a little planning, you’ll leave the trailhead with lighter packs, fuller bellies, and stronger bonds. Now go find three friends, grab one stove, and watch the weight—and the stress—melt away.